To get faster, more consistent speeds when using 4G or 5G internet, you can install an external antenna on your property and connect it to your router.
But before you invest in an external antenna, you might be wondering how much of a speed increase you’ll get, whether you really need an antenna, and what the installation process is like.
In this guide, we’ve explained what you need to know about external antennas for wireless broadband before potentially buying one.
Contents
What are external antennas?
External antennas are pieces of hardware that help you get better, more consistent download and upload speeds when using 4G or 5G internet.
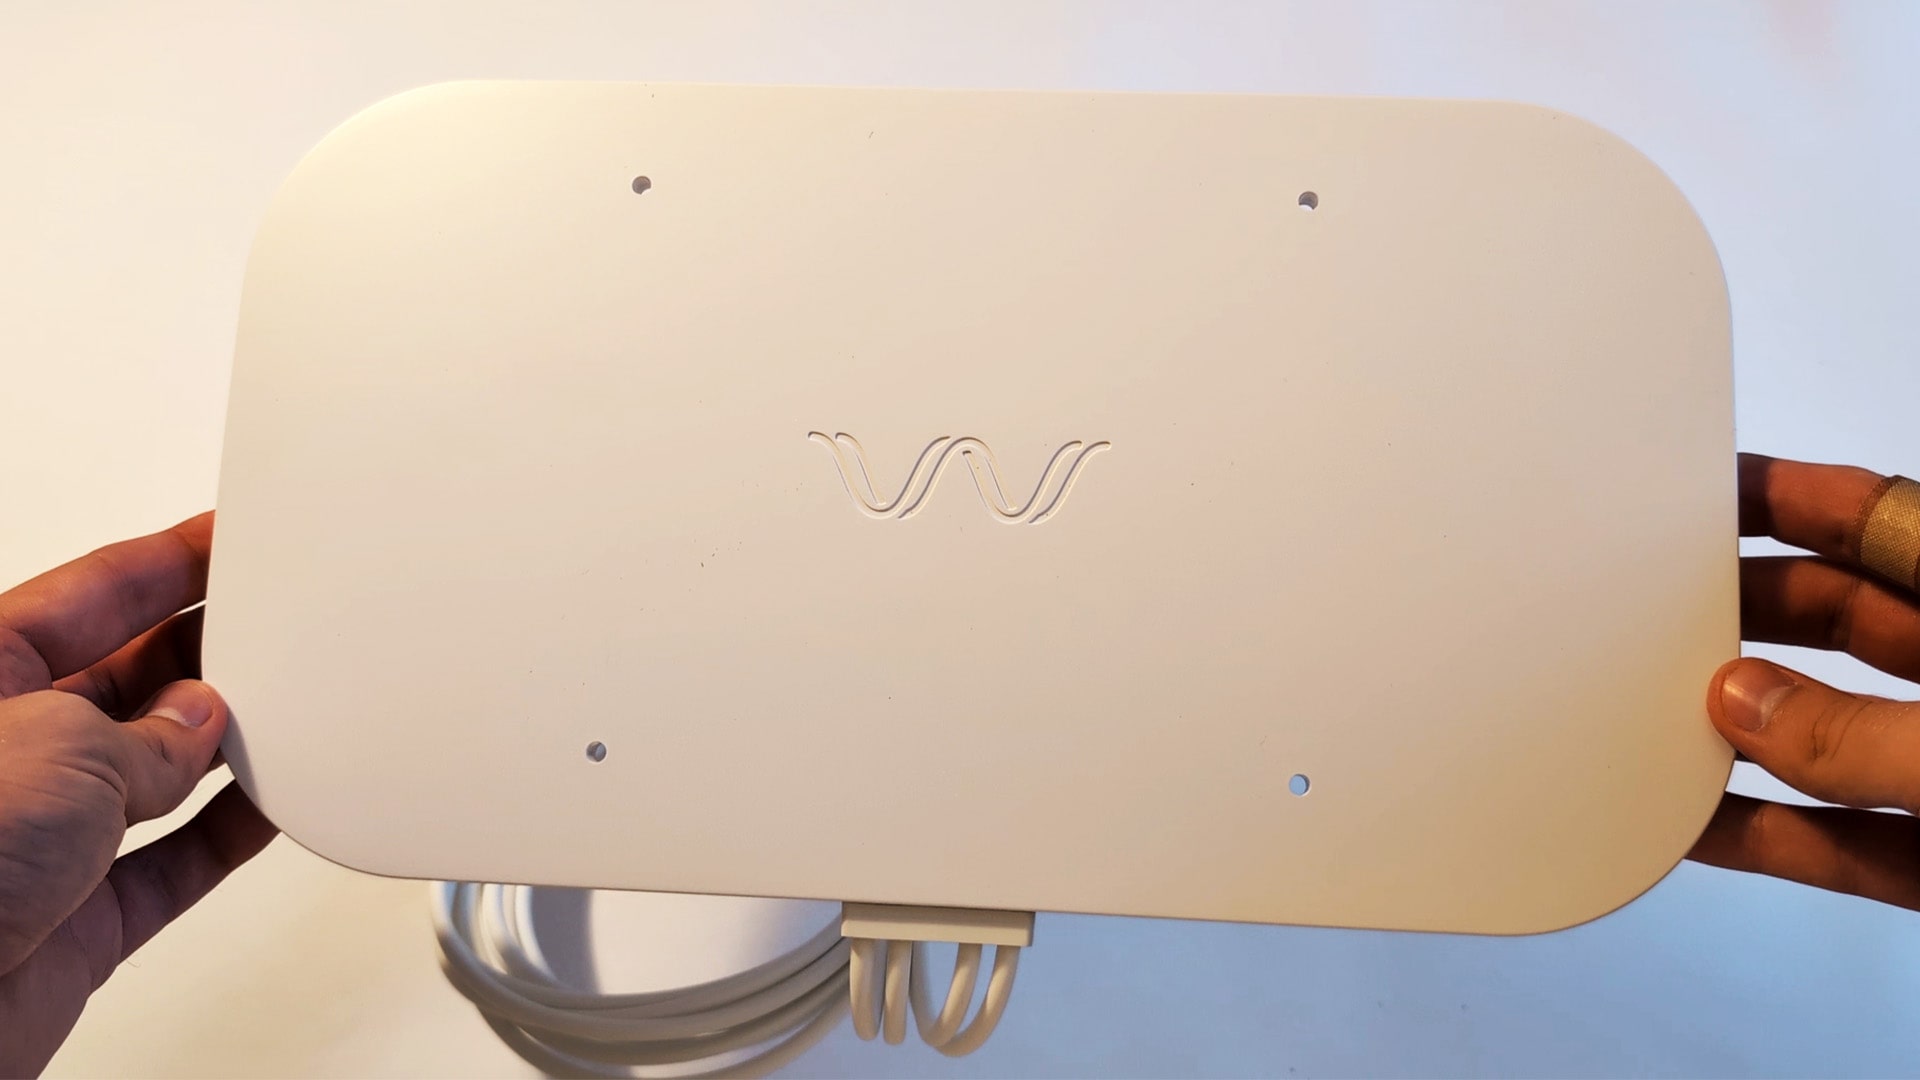
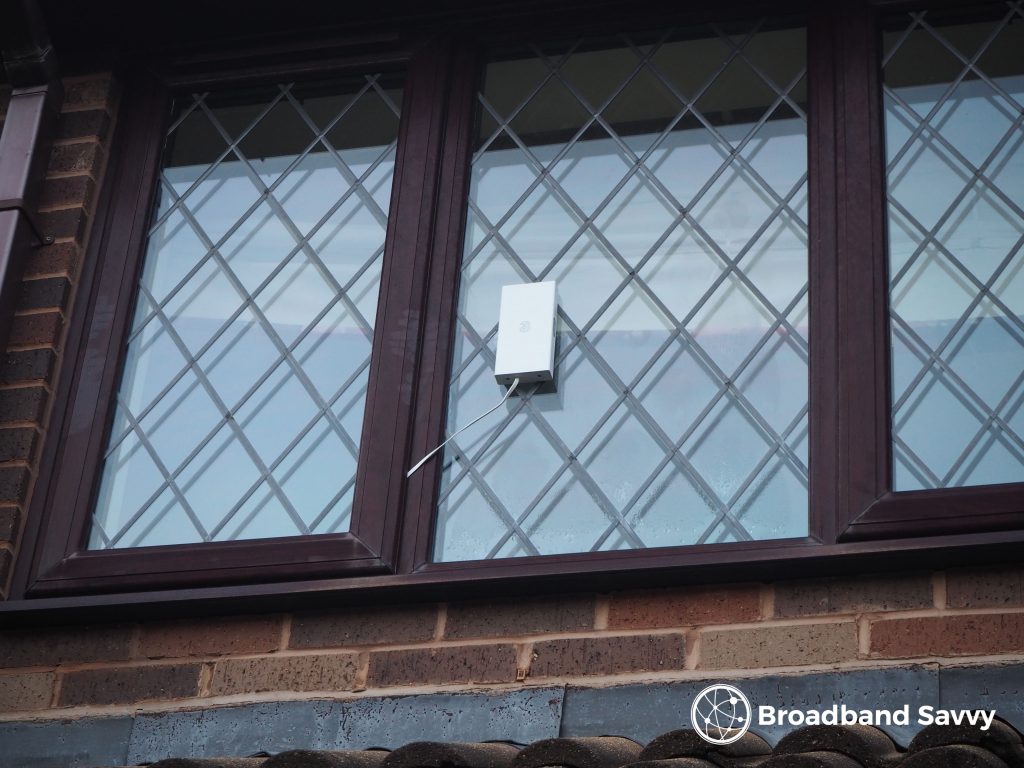
They are designed to be mounted outdoors, normally on the side of a building, and pick up stronger wireless broadband signal than your router’s internal antennas can.
How do they work?
Once mounted outdoors, the external antenna sends and receives wireless internet signal, and passes this to your 4G or 5G router using a data transfer cable.
The antenna is passive, meaning it does not require a power source, and only one cable is needed to connect it to your router.
External antennas and their cables are also weatherproof, meaning that they can be exposed to harsh sunlight, wind, and rain for extended periods with no issues.
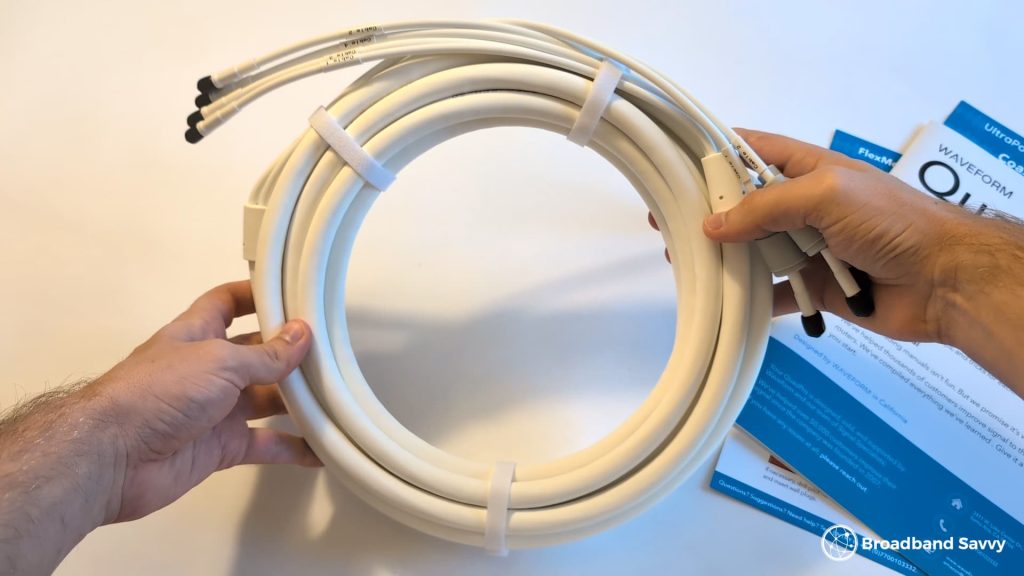
The data transfer cable is usually a special ultra-thin design, meaning it can be closed in a window to feed it back indoors, without affecting data transmission or letting a draught in.
Types of external antennas
These days, external antennas are usually compatible with both 4G and 5G signal – you do not need to specifically buy a 5G antenna if you use 5G broadband, for example.
The two main classifications of antenna are:
Directional vs omnidirectional
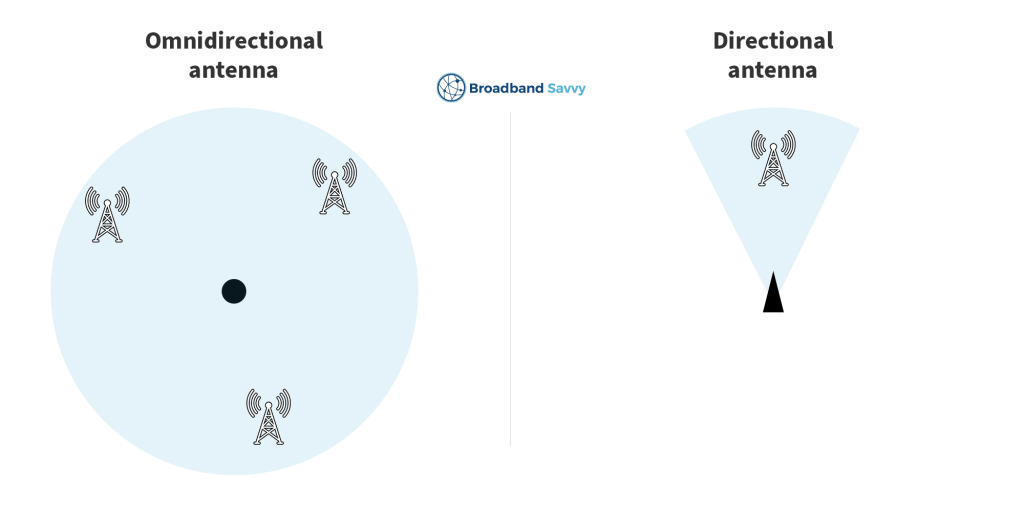
- Omnidirectional antennas transmit and receive signal in a 360-degree radius, allowing them to connect to multiple network masts.
- Directional antennas focus their attention in a specific direction, and are usually designed to be pointed at a specific network mast.
We have personally found that we get better performance with omnidirectional antennas, even when we can see the nearest network mast and aim the antenna directly at it. However, this can vary by location.
Directional antennas are most useful when you have very weak signal, and want to target a specific network mast.
They can often pick up stronger signal in a single direction compared to an omnidirectional antenna.
2x2 vs 4x4 MIMO
This refers to the number of transmitters and receivers that the antenna has.
2x2 MIMO antennas have two transmitters and receivers each, while 4x4 antennas have four each.
Having more transmitters and receivers is better, but you need to ensure compatibility with your 4G/5G router.
- If your router has two external antenna ports, it is designed for use with a 2x2 MIMO antenna.
- If your router has four external antenna ports, it is designed for use with a 4x4 MIMO antenna. You can plug a 2x2 antenna into two of the four ports, but the spare transmitters/receivers will go unused.
If you’re just getting started with wireless home broadband, we recommend buying a 4x4 MIMO antenna and a compatible router if you don’t mind the slightly higher cost.
How to set up an external antenna
1. Find the best place to put the antenna
To get the best possible download and upload speeds, it is crucial that you install the antenna somewhere with strong 4G or 5G signal.
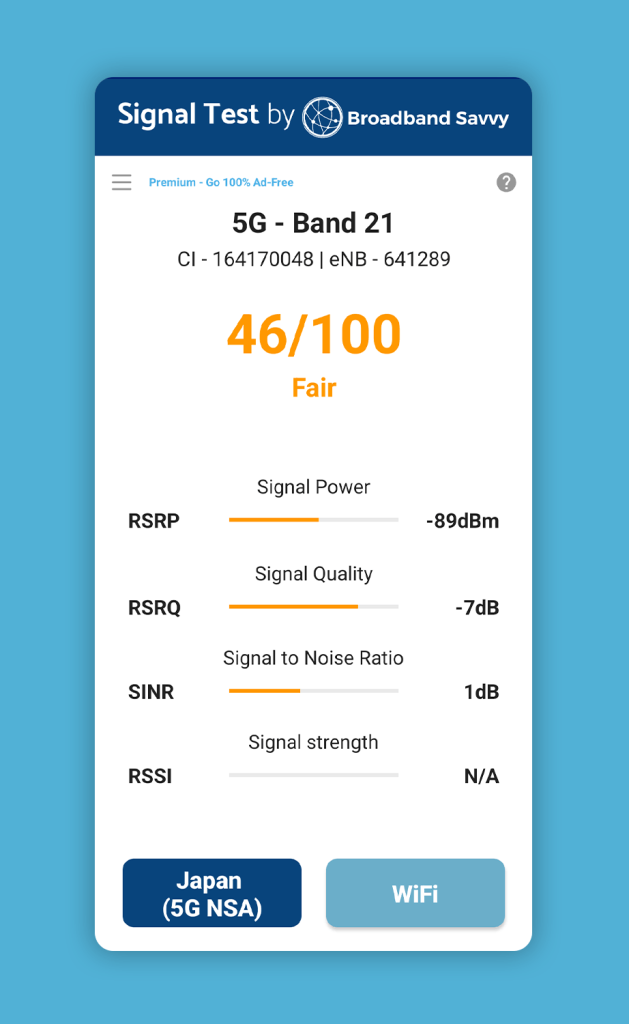
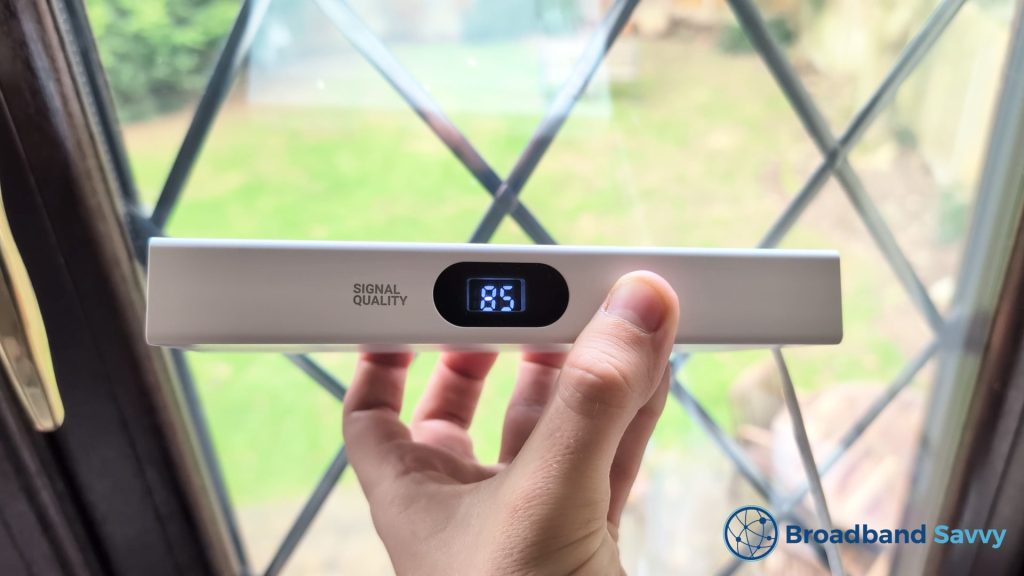
To do this, if you have an Android phone, you can use our free Signal Test app.
Put the SIM you use for home broadband in your phone, and walk around the house to look for places with strong 4G or 5G signal, shown by the score on the app.
Usually, the places with the best signal are on a second storey, on the edge of the property. You can also test locations outside, especially if you have another elevated structure you could mount the antenna on, such as a pole.
Just remember that the antenna will need to be connected to your router by cable, so it cannot be too far away from your house.
Most external antennas can be purchased or come with an extension cable in case the router is far from the antenna installation point.
You can also use the app to find the nearest network mast, to help you angle the antenna properly.
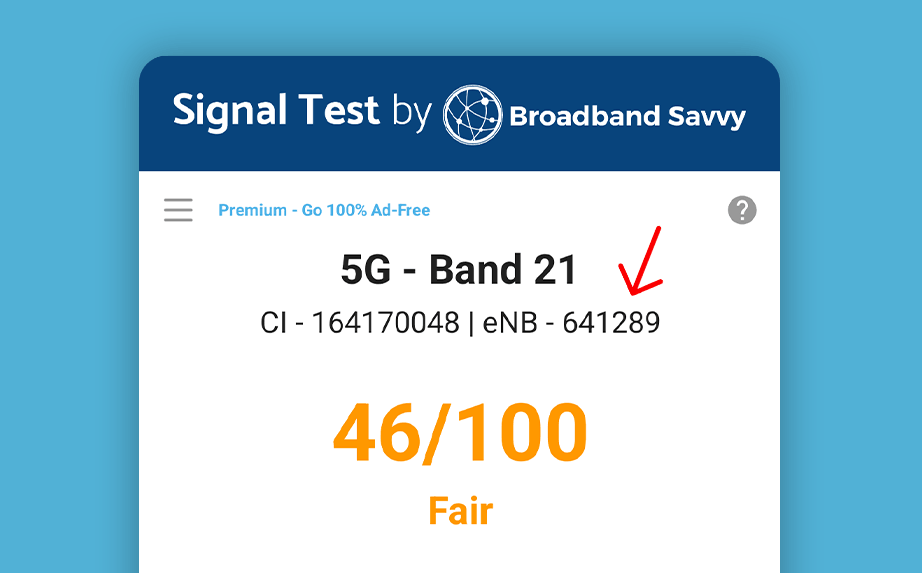
Look for the eNB value at the top of the mobile testing screen. This is the unique ID of the mobile mast your phone is connected to.
Next, go to cellmapper.net, and click “Provider” on the left.
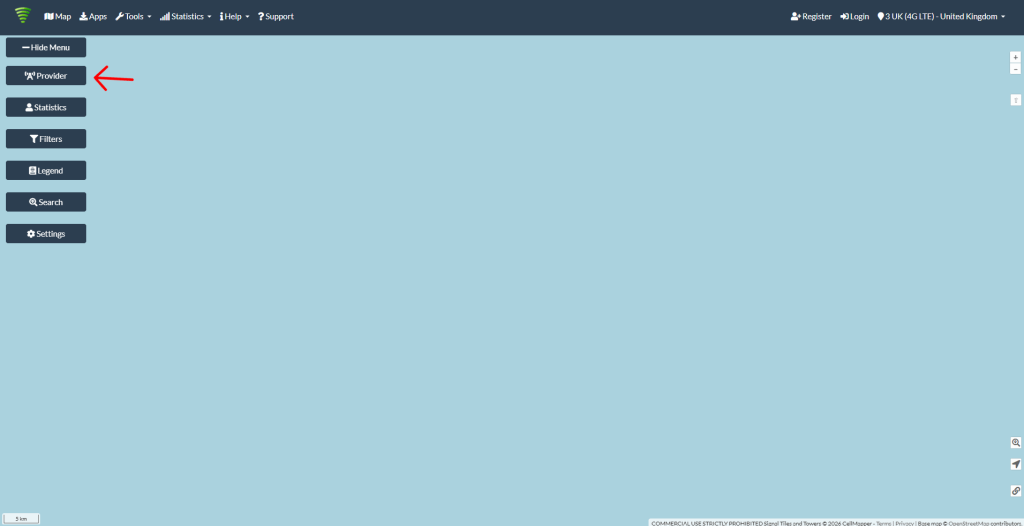
Choose your mobile network. Select 4G LTE even if you are using 5G broadband.
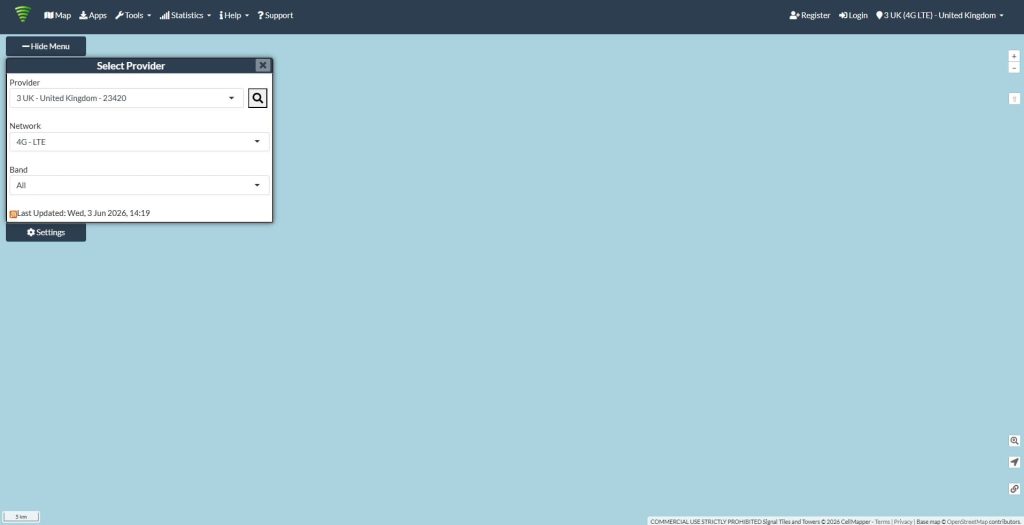
Once this is done, click “Search”, and type in your eNB number.
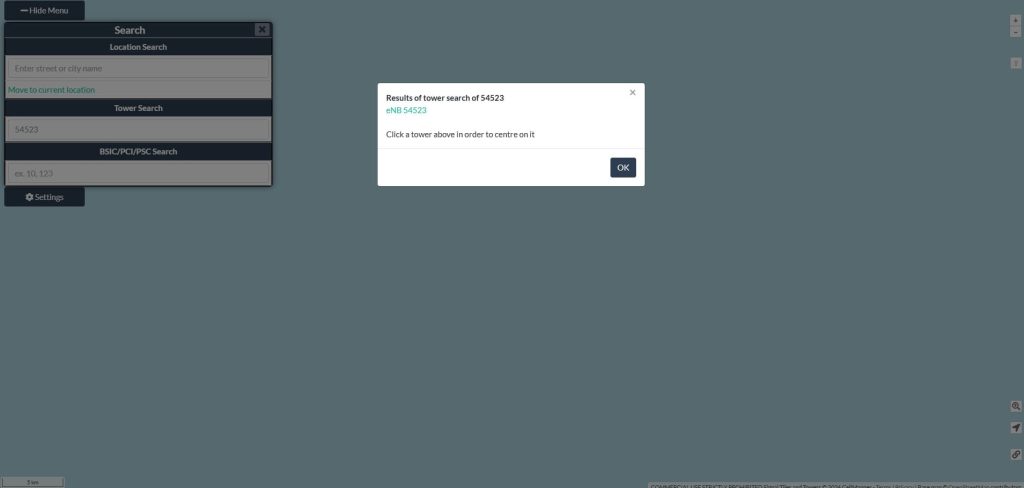
Click the eNB value, and you will see a map showing exactly where the mast is, centred on your area. Zoom out the map to find your house.
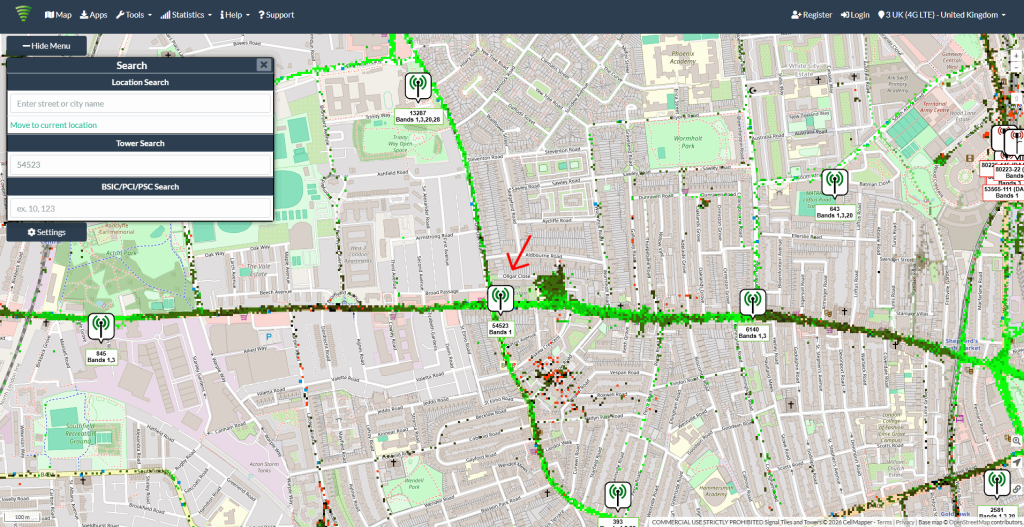
It’s a good idea to point the antenna at the mast, especially if it’s a directional antenna. You may also find your phone connects to different masts depending on where you are located on your property, some of which might offer better performance than others.
If you cannot use the app, you can still use cellmapper.net to find the location of nearby mobile network masts, helping you position and angle the antenna appropriately.
2. Test the installation point
Once you find a spot with good signal, it’s best to test the antenna’s speeds before permanently installing it.
This requires connecting the antenna to your router, which is generally quite simple.
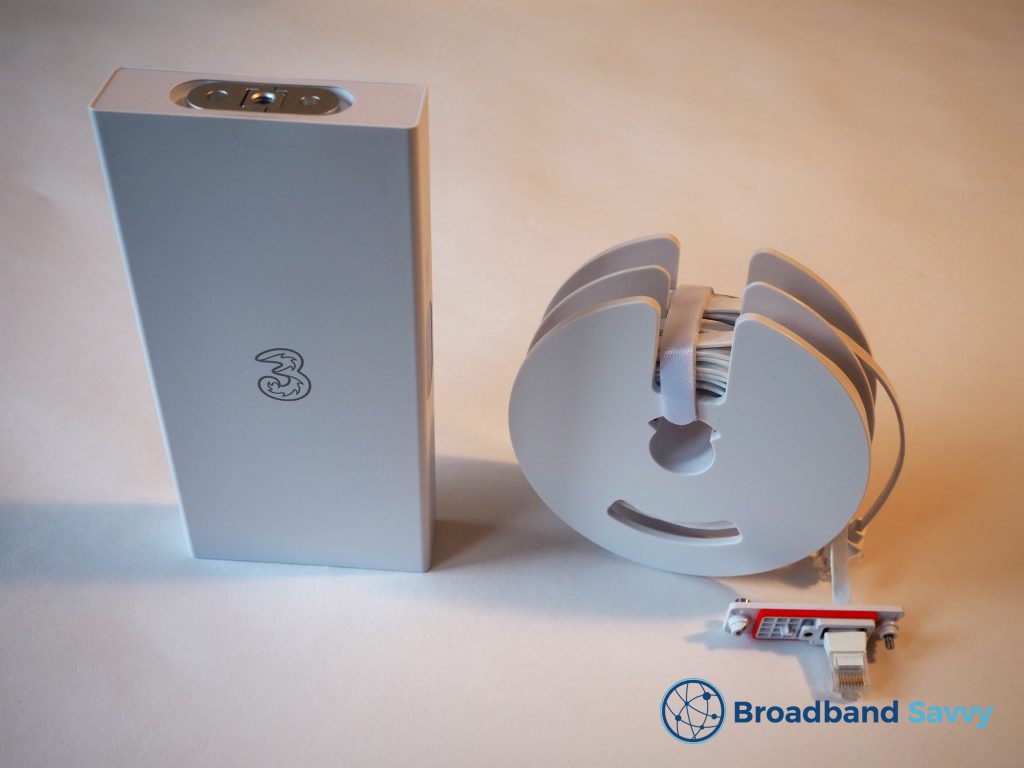
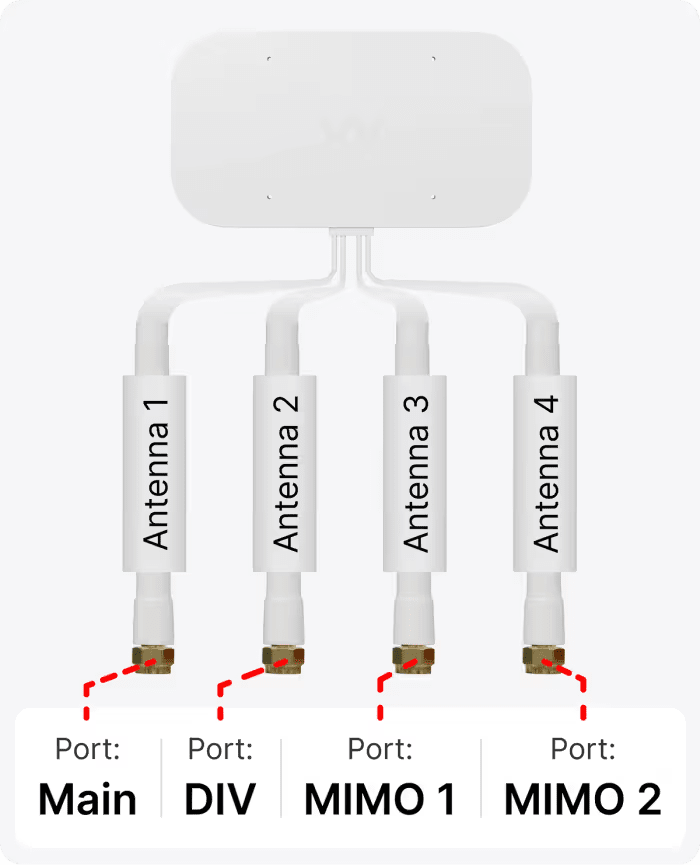
The antenna’s cable will usually split into two if it is 2x2 MIMO, or four if it is 4x4. Or, as is the case with the Three 5G Outdoor Hub, it may just have a single weatherproof Ethernet cable.
Once your router is plugged in and powered on, plug your antenna into its external antenna ports.
Usually, your router ports and antenna cables will both use SMA connectors, which you screw into place to attach them.
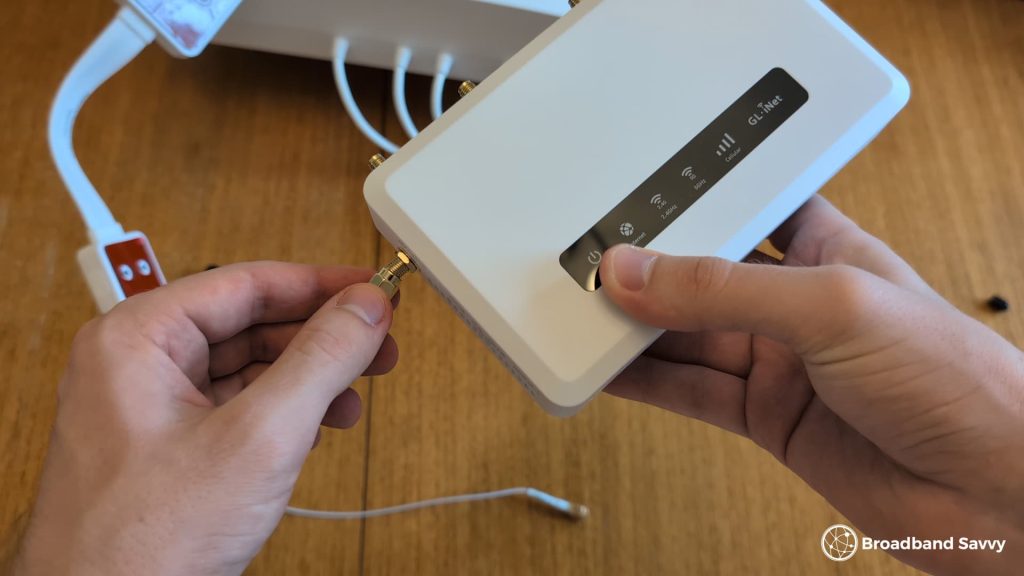
However, some routers have TS9 ports, which push in. In this case, you may need to use adapters, which are often included in the antenna packaging.
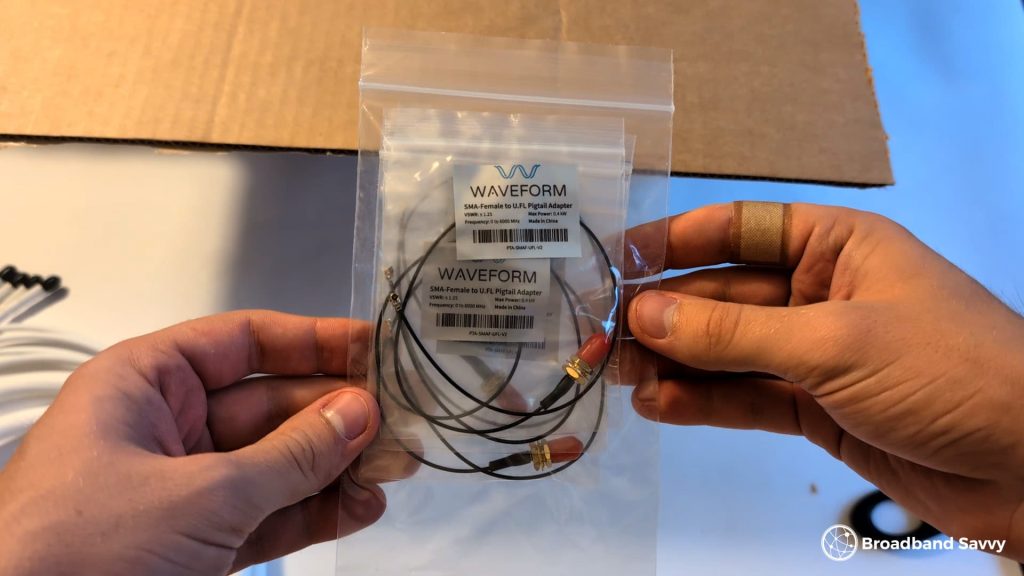
If your antenna has multiple cables, you might sometimes find that they are numbered. This is because the cables need to be plugged into specific ports on the router.
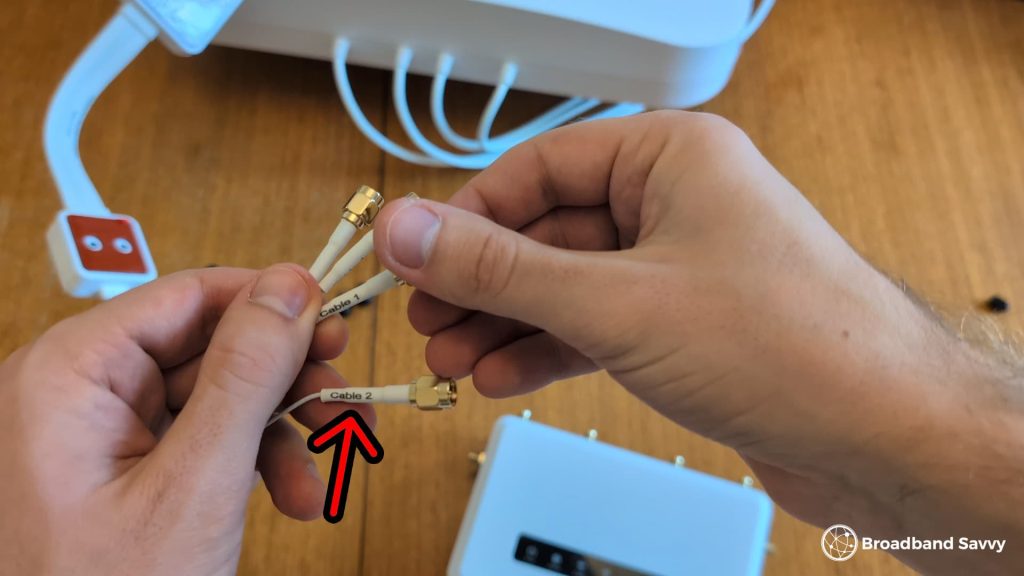
In this case, go to the antenna manufacturer’s website and look for their setup guide for your specific antenna model to find the correct places to plug in each cable.
Once everything is plugged in, set up the antenna temporarily in the mounting position you’re planning on using, and run some speed tests. You might like to get a friend to help hold the antenna.
It’s a good idea to test a few different spots, to see where you get the fastest, most consistent speeds.
Between each location you test, make sure to unplug and plug back in the router to allow it to update the network bands it is using.
3. Mount the antenna
Depending on the antenna you buy and its size and weight, there will likely be a few different mounting methods to choose from.
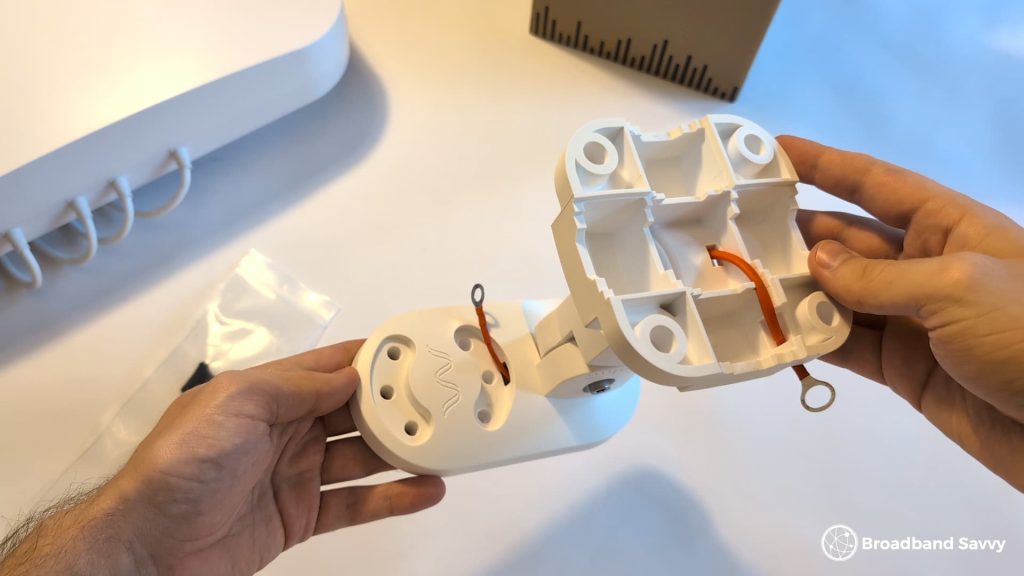
The equipment you need, including brackets, screws, and anchors, is usually included in the box when you buy.
- Small, lightweight antennas can often be installed on a window using included suction cups or double-sided tape.
- Small, lightweight antennas also usually come with a stand you can use to place them indoors on a desk or windowsill, but we do not generally recommend doing this as the antenna really needs to be outdoors to get the best possible signal.
- Most antennas come with a bracket that can be screwed into brick or concrete.
- Some antennas come with a clamp that can be attached to a circular pole, including potentially an old satellite dish J-pole or a flagpole.
The most important thing when mounting the antenna is that it is in the best position to pick up strong mobile signal.
And as we touched on before, the cable needs to be able to reach back to where your router is set up, in order to connect the two. But you can usually buy extension cables from the antenna manufacturer if need be.
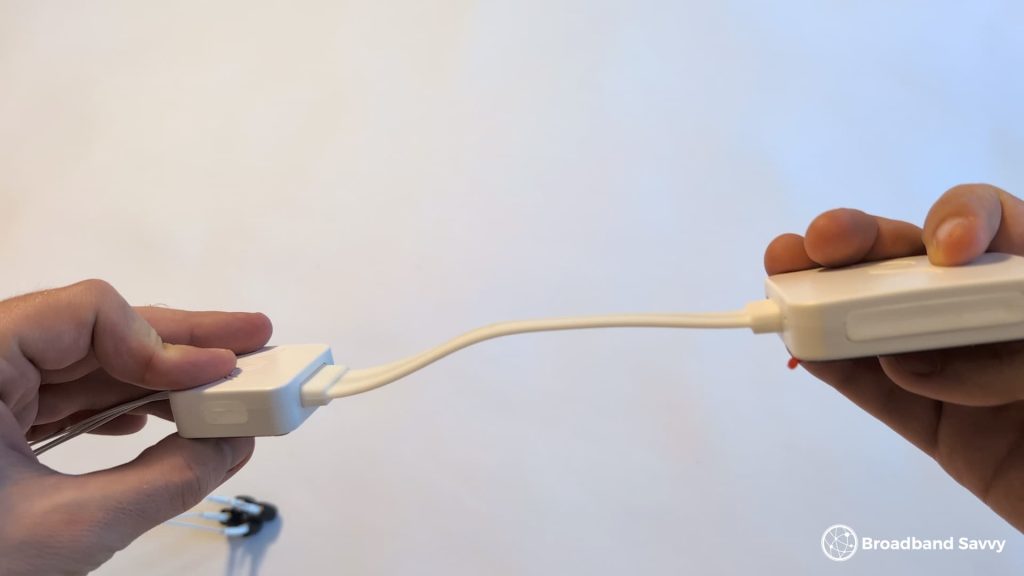
4. Connect the antenna to your router
For the final installation, you’ll need to connect the antenna’s cable to your router, just like you did when testing.
The only difference is, you might like to do this in such a way that you don’t have to leave a window open.
As we touched on before, most antennas have a type of cabling that can be shut in a window.
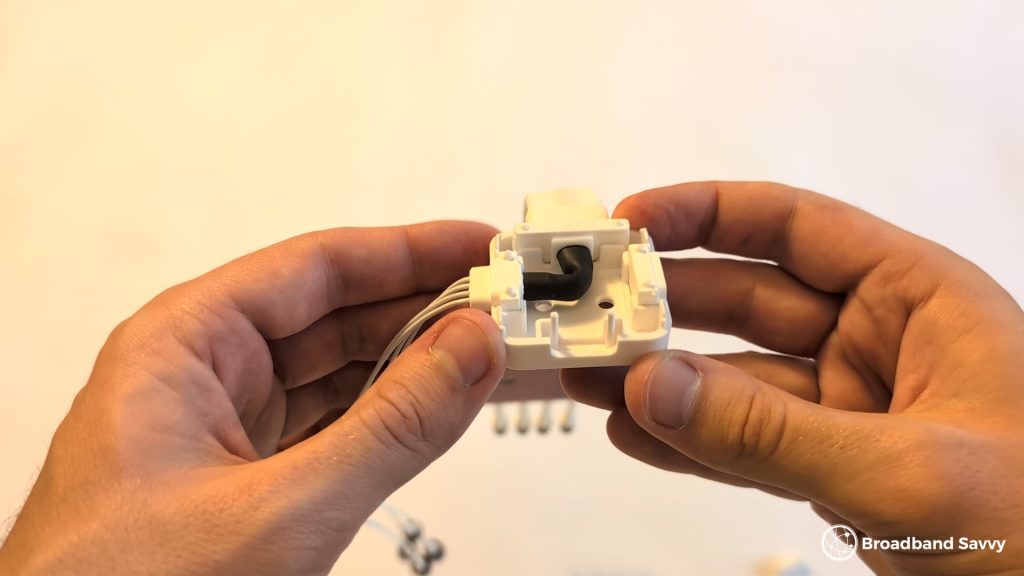
Others have specific window entry cables, which you can use on the end of the main cable to feed the antenna’s signal back inside.
On the Waveform window entry cable shown above, you can pop off the plastic cover and reorient the cable 90 degrees in any direction to meet your needs when installing, and it also has double-sided tape you can use to affix the cable and its housing in position.
You may also have existing ducting on your property for security cameras or other outdoor tech that you can use with your antenna, rather than feeding its cable back inside through a window.
Do I need an external antenna?
You likely need an external antenna if you do not get very good or very consistent speeds when using 4G or 5G broadband.
This is especially true if you know that the router’s signal is compromised, for example because it is a long way away from the nearest mobile mast.
However, even if you get decent download and upload speeds and don’t technically need an external antenna, you can still get a significant speed increase by installing one a lot of the time.
What speed increase will I see?
Depending on how weak your signal is to begin with, what type of antenna you buy, and how you install it, you should see a speed increase of 10-100% by switching from your router’s internal antennas to an externally mounted one.
A lot of the time, external antennas are recommended for rural 4G internet deployments where you are a long way from the nearest mast. In this case, a directional antenna can help you move from a download speed of 10 to 20 Mbps to something more like 30 to 40 Mbps on a more consistent basis.
When using 5G broadband in a more urban area, we normally see more like a 20-50% speed increase, as well as a significant improvement in consistency.
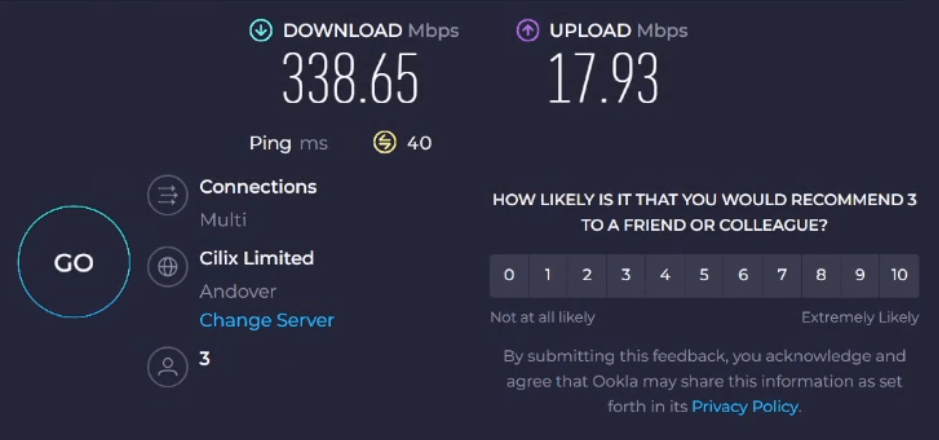
For example, on the regular Three 5G Hub with no antenna installed, our speeds usually look something like this:
But using their 5G Outdoor Hub, which comes with an external antenna, our speeds are more like this:
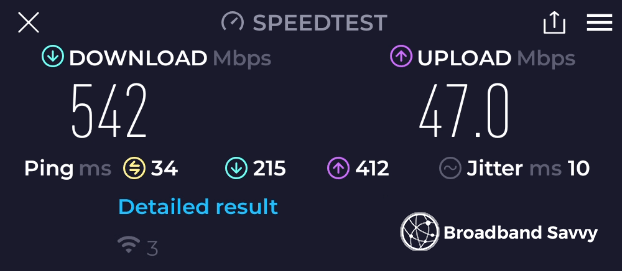
This can vary from address to address, and you may not see your upload speeds more than double, as we did.
However, you can usually get a significant increase in your average download and upload speeds using an external antenna with your 4G or 5G router.
For more on this subject, watch our YouTube video discussing the speed differences between internal and external antennas:
Which external antenna should I buy?
For an all-in-one router, SIM plan and antenna bundle, we quite like the Three 5G Outdoor Hub.
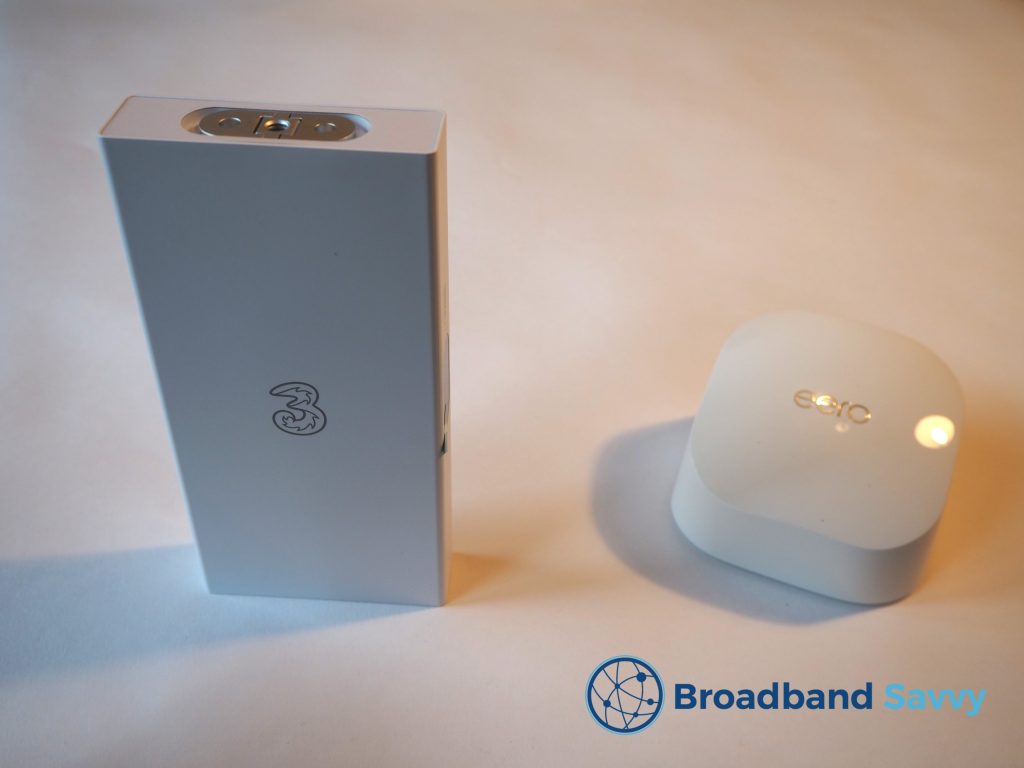
Assuming you can get good enough 5G signal at your address (you can see this on Three’s postcode checker), the Outdoor Hub offers download speeds of around 500 Mbps from our testing, for a very low monthly cost.
It’s also quite easy to set up, in part because there’s only one very thin cable connecting the antenna to the router, and partly because the antenna itself has a signal gauge, which is quite helpful.
If you already have a router, or want something to use with 4G internet, the Waveform Quadmini is worth looking at.

We also like how easy it is to install – it has suction cups you can use to put it on a window, and we saw a 20-40% speed boost using this bit of kit compared to having no outdoor antenna.
The one problem is, the Quadmini is not directional, so it isn’t the best in very remote areas where there’s just a single mast you want to connect to.
In this case, Waveform has other bulkier antennas, such as the Quadpro, which might be a better choice.

If you’re unsure which antenna to buy, or how best to get set up with one, leave us a comment below, and we’ll get back to you as soon as we can.
Related resources

Three 5G Outdoor Hub Review | External 5G Antenna
Learn about the Three Outdoor 5G Hub, including what it's like to set up and use, and what download and upload speeds it offers.
Three 5G Hub Review | Is Three 5G Broadband Any Good?
Read our review of the Three 5G Hub. We unbox the Three 5G home broadband router, do a speed test, and see whether it's...
Three 5G MiFi Review | ZTE U50 Mobile Broadband
Learn about Three's 5G MiFi deals. We review the ZTE U50 on Three to see if their 5G MiFi plans are worth buying.
Three 4G MiFi Review | Huawei Mobile WiFi Router | 2026
We review the Huawei E5783-330 4G MiFi device from Three. Discover the speeds offered by this mobile WiFi device, and if it's worth buying.

Tom is the founder of Broadband Savvy. He has nearly 10 years’ experience writing broadband tutorials, reviewing routers and internet service providers, and explaining broadband-related concepts. Tom is experienced as a writer, has appeared on national radio and in national newspapers, and also produces videos for the Broadband Savvy YouTube channel.
He currently specialises in writing content for Broadband Savvy designed to help people understand broadband jargon and terminology, increase their download and upload speeds, and improve their Wi-Fi connectivity. Tom also occasionally contributes to buyer’s guides and review articles on Broadband Savvy, utilising his knowledge of the broadband market in the UK.
When he’s not writing about broadband, you’ll find him hiking somewhere or playing on his Nintendo Switch.