
Looking at getting online using the Three 5G Outdoor Hub?
In this article, we’ve reviewed Three’s 5G external antenna, eero router, and unlimited data SIM bundle, to see how it performs in the real world.
We’ve explained the setup process, performed speed tests, and assessed its WiFi performance, to see if the Outdoor Hub is worth buying.
But before we begin, put in your postcode on the Three Home Broadband coverage checker to see whether they recommend you use the 4G Hub, 5G Hub, or Outdoor 5G Hub at your address, given the level of 4G/5G signal in your area.
Contents
- Three 5G Outdoor Hub overview
- Three 5G Outdoor Hub setup process
- Three 5G Outdoor Hub speed tests
- Three 5G Outdoor Hub WiFi performance
- Three 5G Outdoor Hub gaming test
- Three 5G Outdoor Hub value for money
- Is the Three 5G Outdoor Hub worth buying? Our verdict
- Three 5G Outdoor Hub alternatives
- Conclusion
Three 5G Outdoor Hub overview
| Brand | Three |
| Name | Outdoor 5G Hub |
| Manufacturer brand | Greenpacket (antenna) | eero (router) |
| Manufacturer model | Greenpacket GP Atom FIU H5 (antenna) | eero 6 (router) |
| Dimensions | 85 x 172.5 x 25mm (antenna) | 97 x 61.5 x 99.4mm (router) |
| Ethernet ports | 1 (1Gb) (antenna) | 2 (1Gb) (router) |
| Water/dust resistance | IP65 (antenna) |
| Phone socket | N/A |
| WiFi | 802.11a/b/g/n/ac/ax (WiFi 6), dual-band, 2x2 MU-MIMO |
| Maximum connected devices | 128 |
| Colour | White |
| Our rating | 4.8 (out of 5) |
| Price | Check on Three |
The Three 5G Outdoor Hub is a 5G home broadband package sold in the UK by Three.
Instead of just coming with a 5G router and SIM card, like the regular Three 5G Hub, the Outdoor version includes an external antenna, designed to be mounted outdoors, to help you pick up better 5G signal, and get faster download speeds.
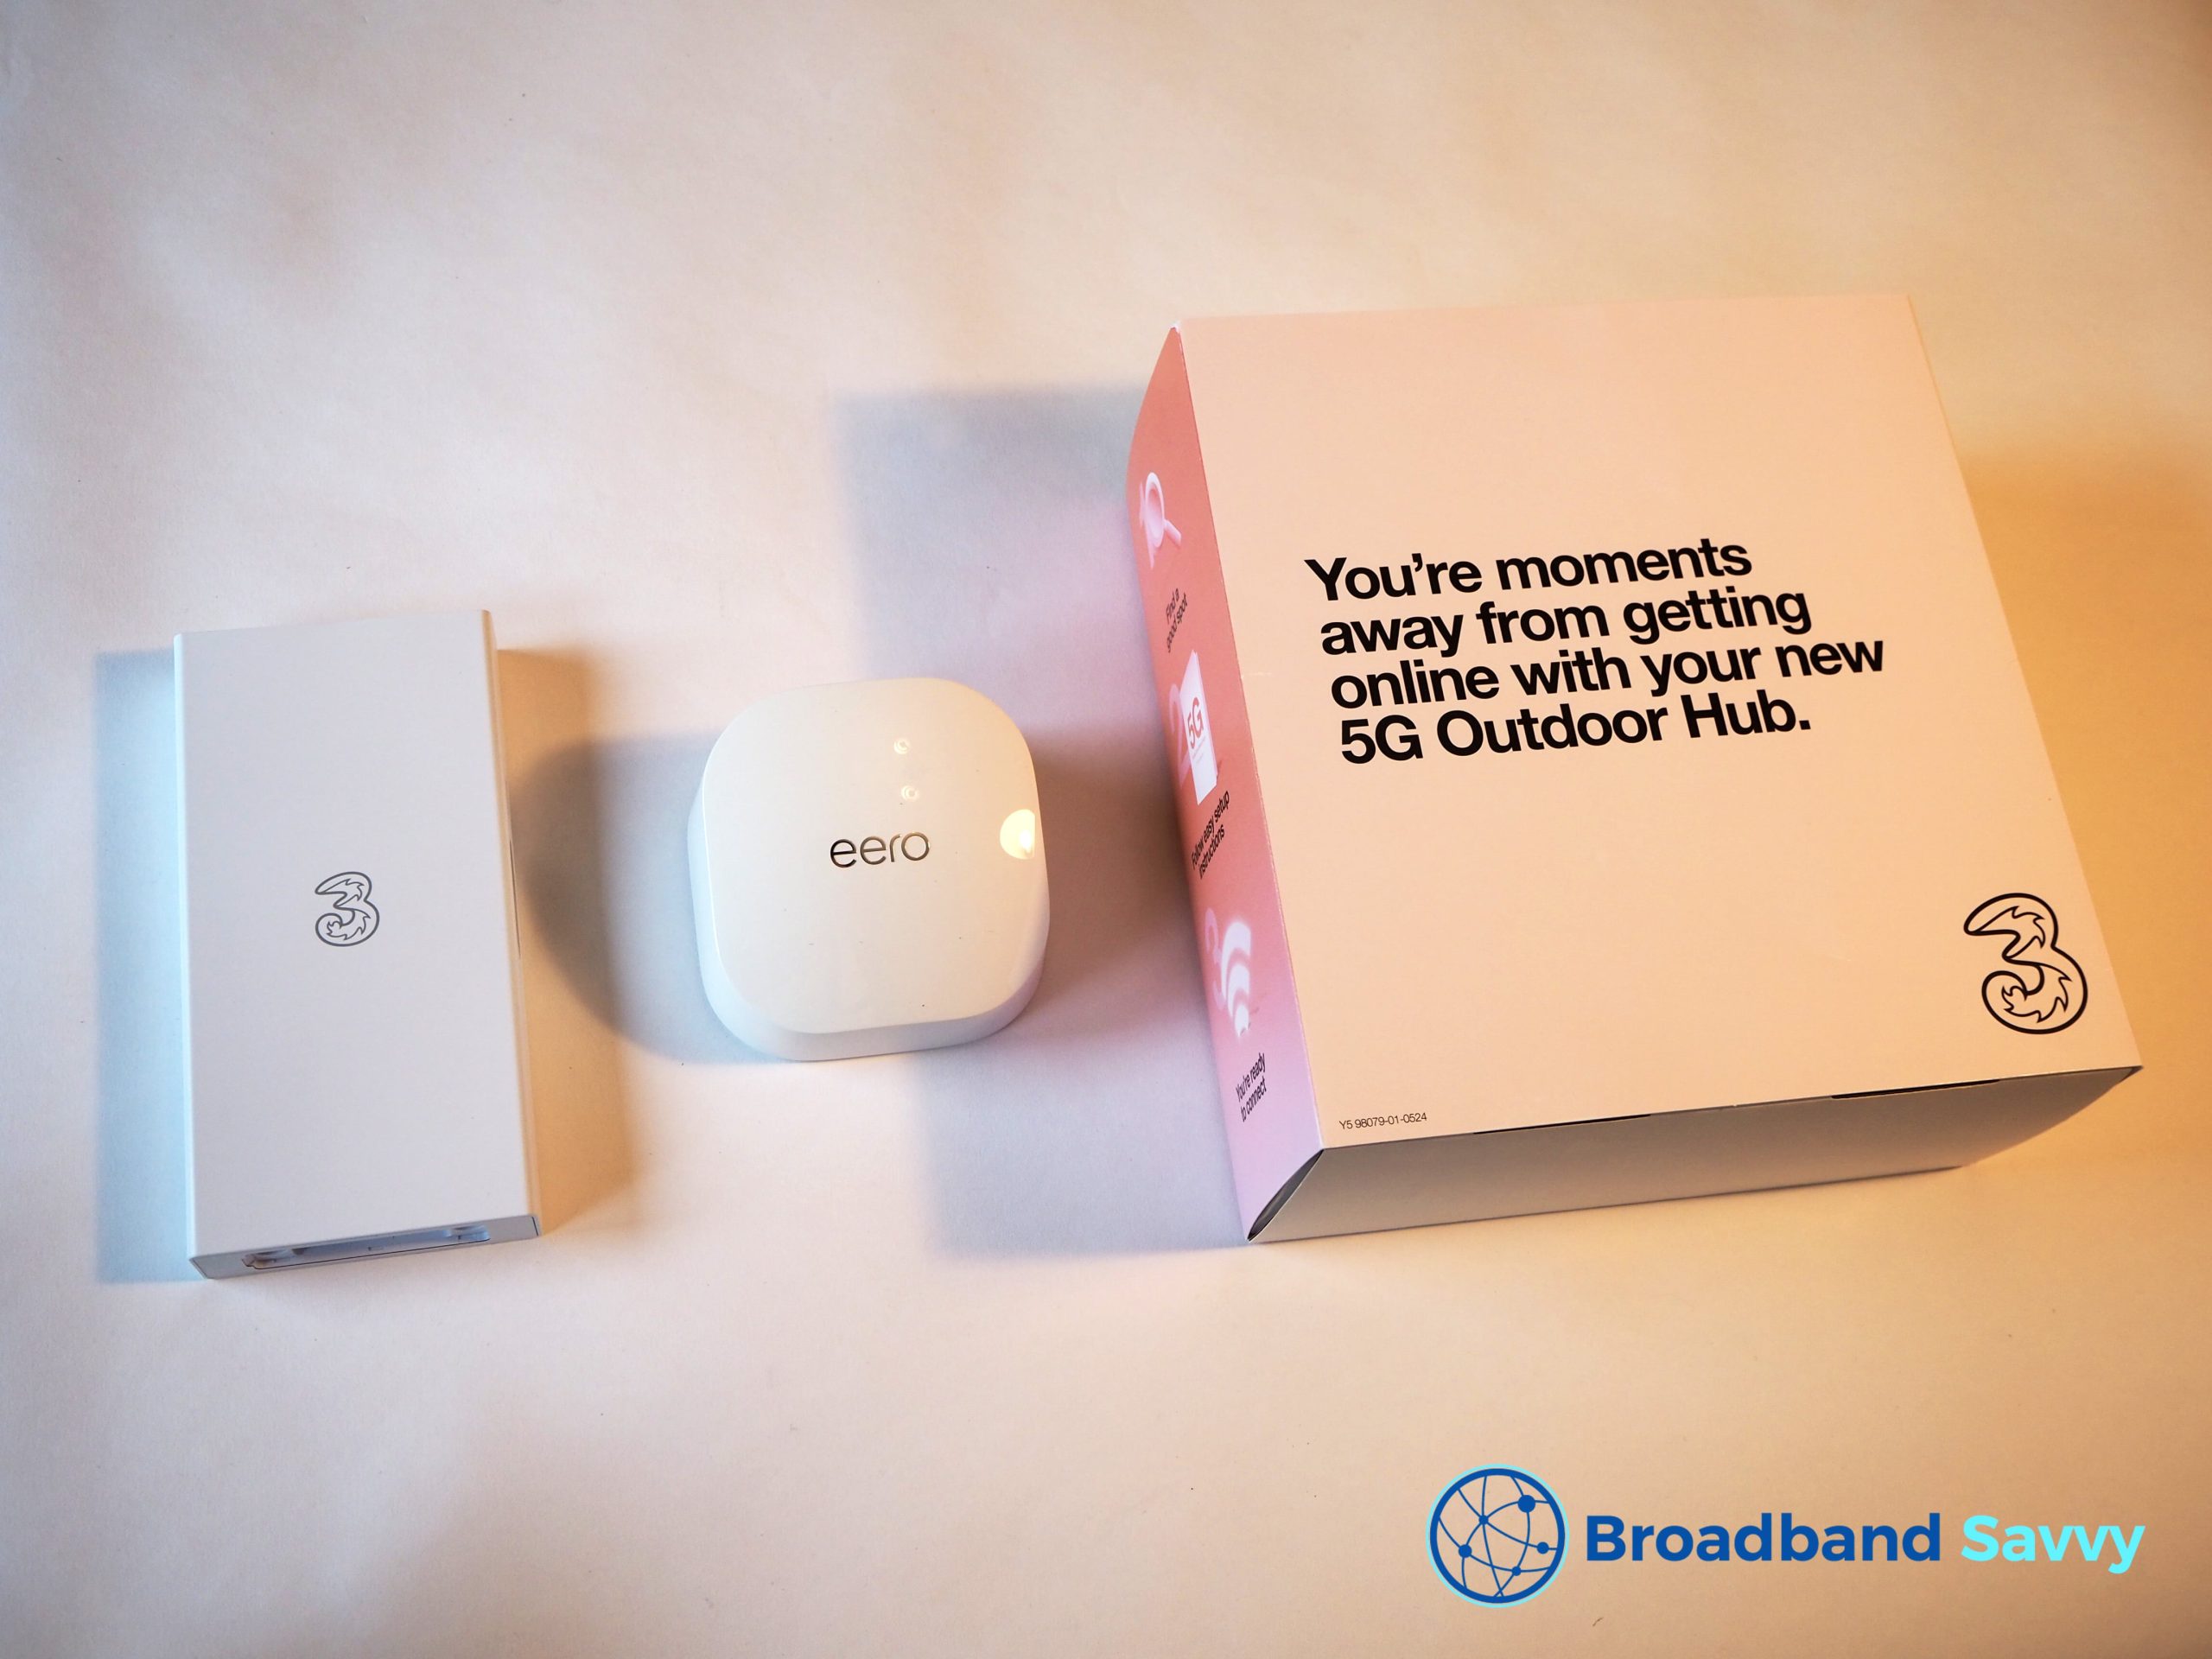
When you buy the Outdoor 5G Hub, you’ll receive:
- A weatherproof outdoor antenna – can resist wind, rain, snow, and dust.
- An eero 6 WiFi router.
- An unlimited data 5G SIM (comes installed in the antenna out of the box).
- A power over Ethernet (PoE) adapter – basically a small gadget that connects the router and antenna.
- Everything else you need to get online, including cabling, and equipment for four different methods of mounting the antenna, depending on what works best for you.

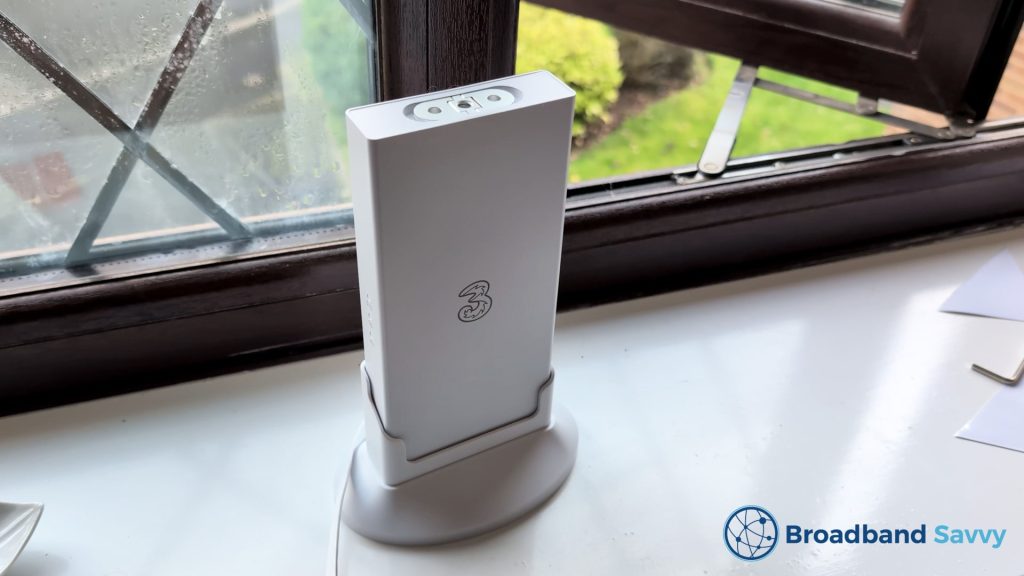
To get started, the first step is to install the antenna somewhere it will pick up good 5G signal. We mounted ours on a window.
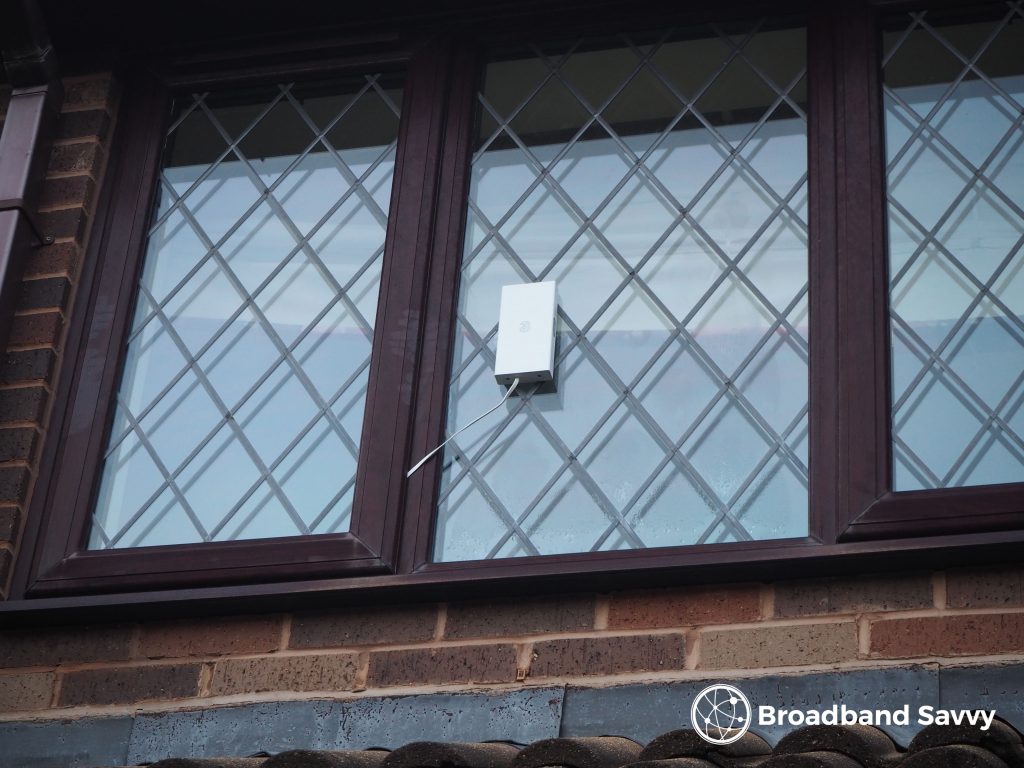
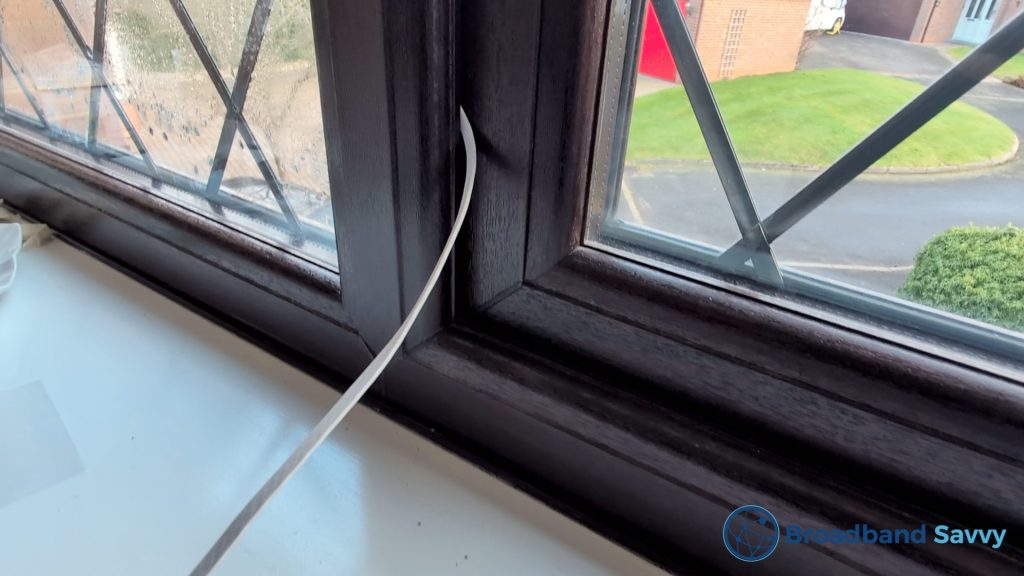
Three includes a special Ethernet cable you can feed through a window – you can close the window without damaging the cable, and still achieve a complete seal.
The other end of the cable plugs into the PoE adapter, then the PoE adapter plugs into the eero WiFi 6 router, using another supplied Ethernet cable.
Once you plug the router into power, it creates a WiFi hotspot you can use to get online.
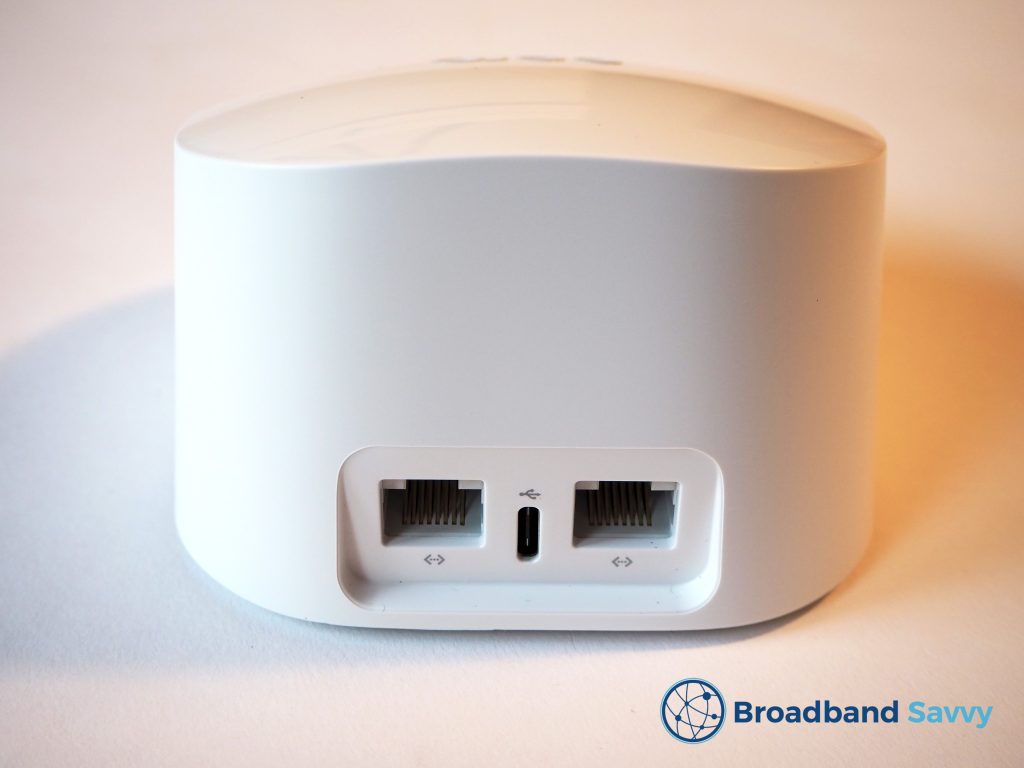
There is also a spare Ethernet port on the eero 6, allowing you to plug a device into the router directly.
When the equipment arrives, you can install it yourself – you don’t need to book in an engineer visit.
Although there are a few steps involved, the process is actually quite straightforward – we’ve explained what’s involved in the next section.
Currently, the 5G Outdoor Hub is sold on a 24 month pay monthly contract, with unlimited data.
When you enter your postcode into the Three Home Broadband coverage checker, they will recommend the 5G Outdoor Hub if you can get good outdoor but not indoor 5G signal, according to their network coverage map.
If you have strong indoor 5G signal, they will recommend their router-only 5G Hub plans, which do not come with an external antenna. They may also direct you toward their 4G Hub router if you can only get 4G signal at your address.
Three 5G Outdoor Hub setup process
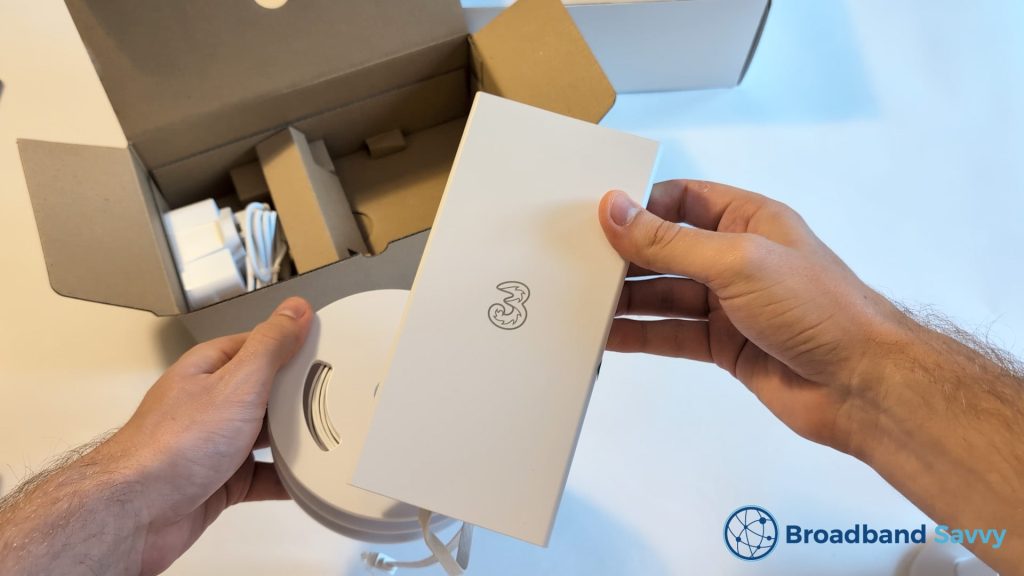
When your Outdoor 5G Hub package arrives in the mail, here’s what you need to do to get started.
1. Find the spot with the best 5G signal
To get the most from your antenna, it’s important to install it somewhere with strong 5G signal, as the signal strength on offer can vary quite a lot across different parts of your property.
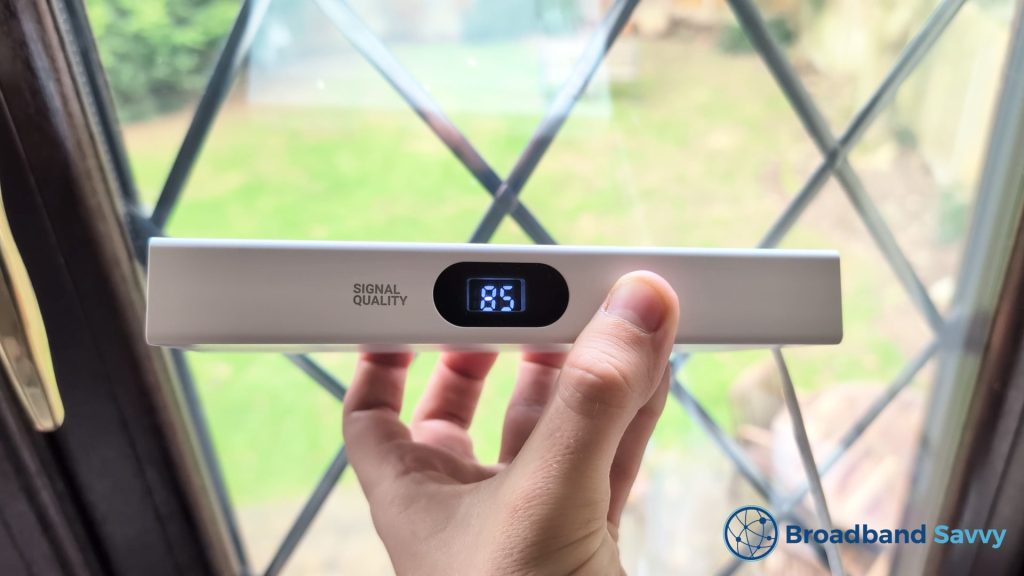
Fortunately, the antenna has a digital signal measurement gauge on the side, which makes it really easy to find somewhere with strong signal.
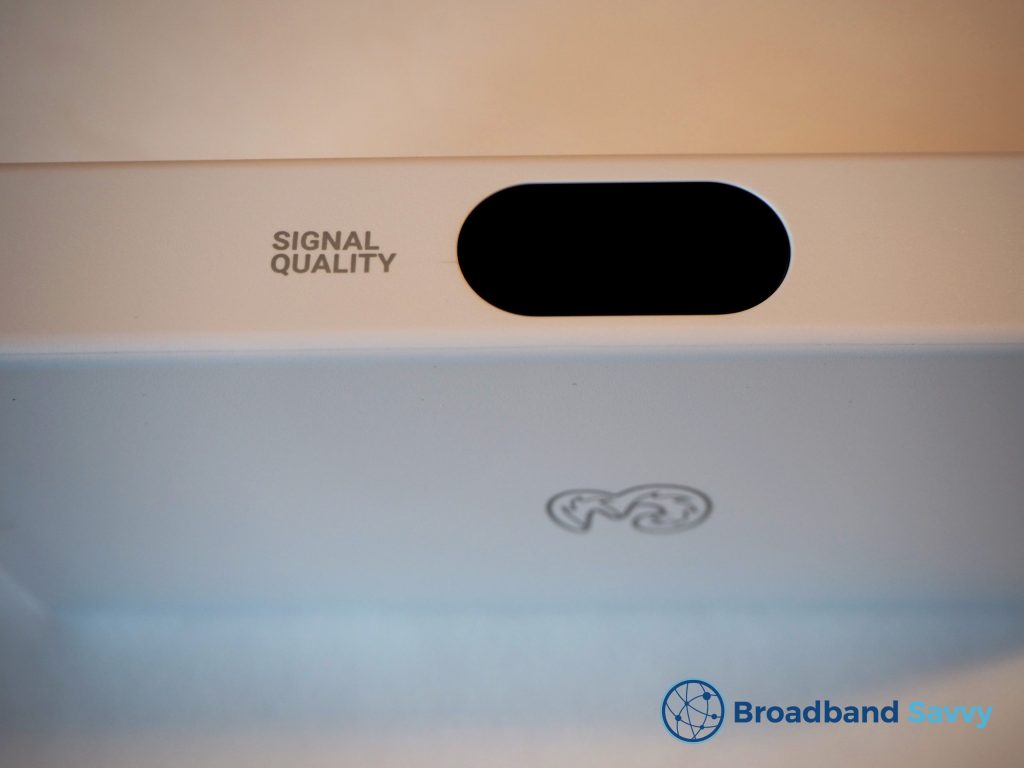
Plug the antenna into the PoE adapter, using the Ethernet cable spool it’s attached to, then plug the PoE adapter into power. After a few minutes, the antenna will power on, and you will see a double-digit signal reading on the display.
You might notice at this stage the Ethernet cable is essentially screwed into the antenna. This is a waterproof enclosure, secured by two small bolts, which you can remove with the included Allen key if you ever need to unplug the Ethernet cable.
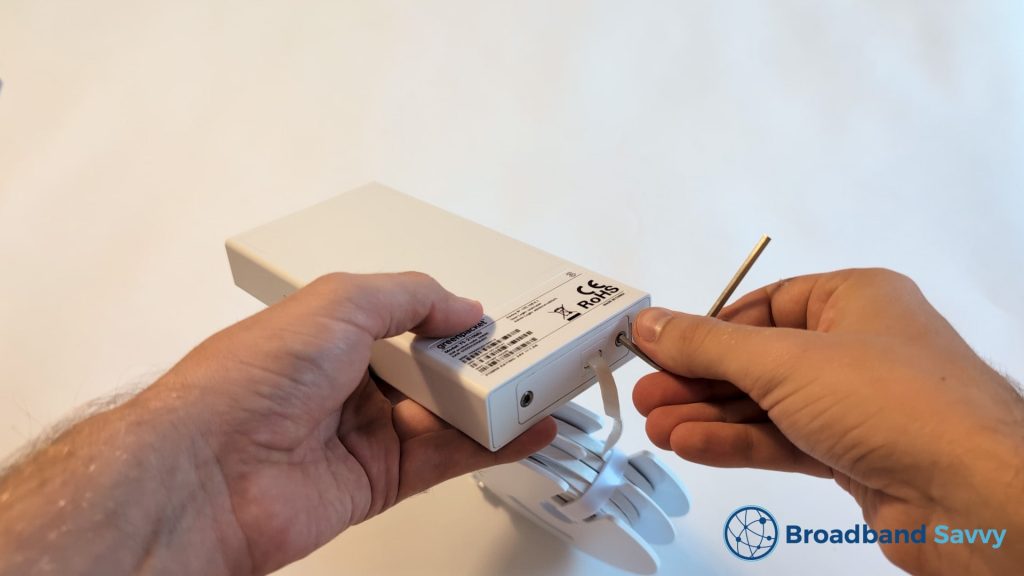
However, it’s normally best to keep the enclosure closed, since you need to keep the Ethernet cable plugged in to use the antenna. The SIM card slot is also located in this enclosure.
Once the antenna has powered on, move around the edges of the house, to see where you get the best signal. You’ll need to unplug the PoE adapter and plug it in again at a different power socket as you move around.
In general, the best place to get good signal is a second storey (if you have one), on the edge of the property. But you also don’t want to go too high, because this can introduce interference.
Here is a rough guide to what the numbers on the signal gauge mean:
- 90-100: Excellent 5G signal
- 80-89: Good 5G signal
- 70-79: Fair 5G signal
- 60-69: Weak 5G signal
- 50-59: Excellent 4G signal
- 40-49: Good 4G signal
- 30-39: Fair 4G signal
- 20-29: Weak 4G signal
The numbers will fluctuate a lot, but if they stay in the “Good” or “Excellent” range for at least five seconds or so on a consistent basis, and only drop down momentarily, this is generally a good spot to install the antenna.
2. Mount the antenna
Once you find a spot with good signal, you can set up the antenna.
Before doing this, apart from the signal you’ll get, you also need to consider how you will feed the Ethernet cable indoors from the antenna. Through a window is best, in our opinion – remember you can fully close the window without introducing any air gaps, as the cable is very thin.
There are four installation options that Three provides equipment for:
Indoor installation: generally not recommended, as your signal won’t be as strong as if you install the antenna outside. Three provides a plastic stand you can use to put the antenna on a windowsill or desk.
The Ethernet cable feeds into the antenna from underneath, through a hole in the stand. Therefore, you will need to unscrew the weatherproof enclosure before you put the antenna in the stand, then screw it back into place once the cable is fed through.
Wall installation: Three provides screws, wall plugs, and a mounting bracket that attaches to two metal prongs on top of the hub. This kit is designed for drilling into a brick wall to install the antenna.
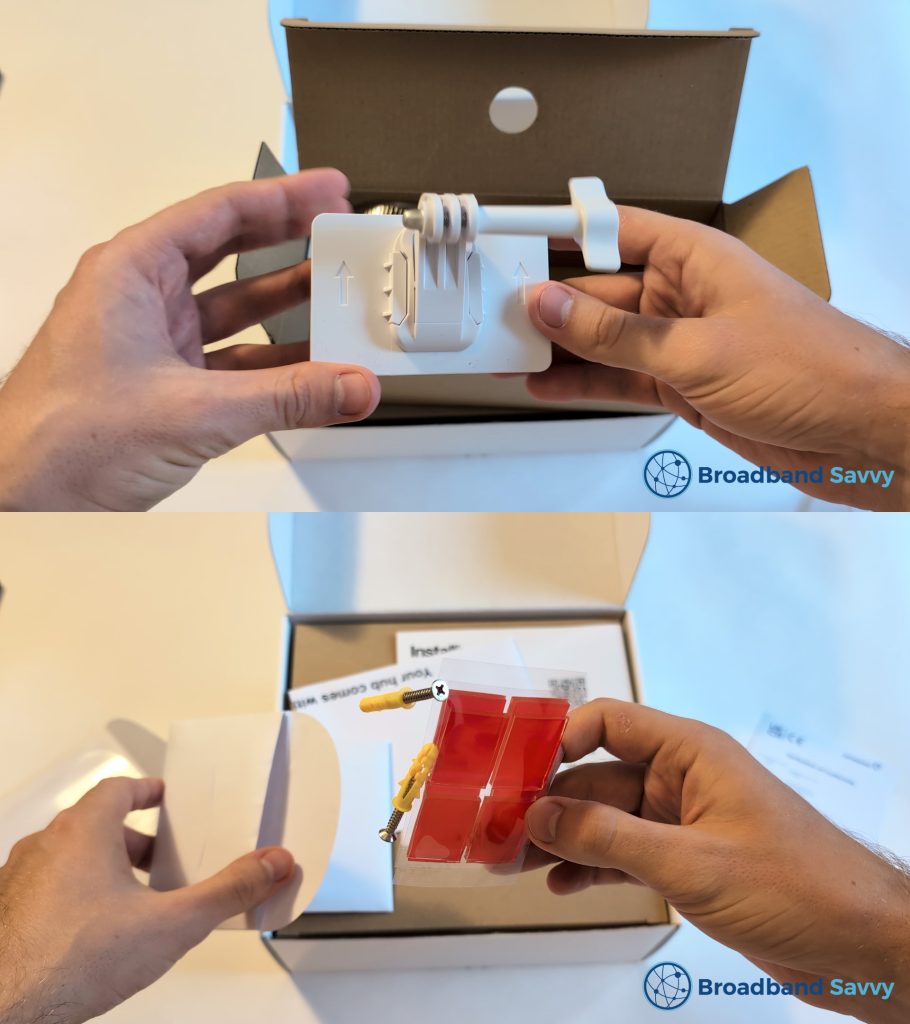
Pole installation: Three provides a bracket and jubilee clip designed for mounting the antenna on a round pole up to 80mm in diameter. This can be quite a convenient option if you have round gutter pipes, but ours are square, so this didn’t work for us.
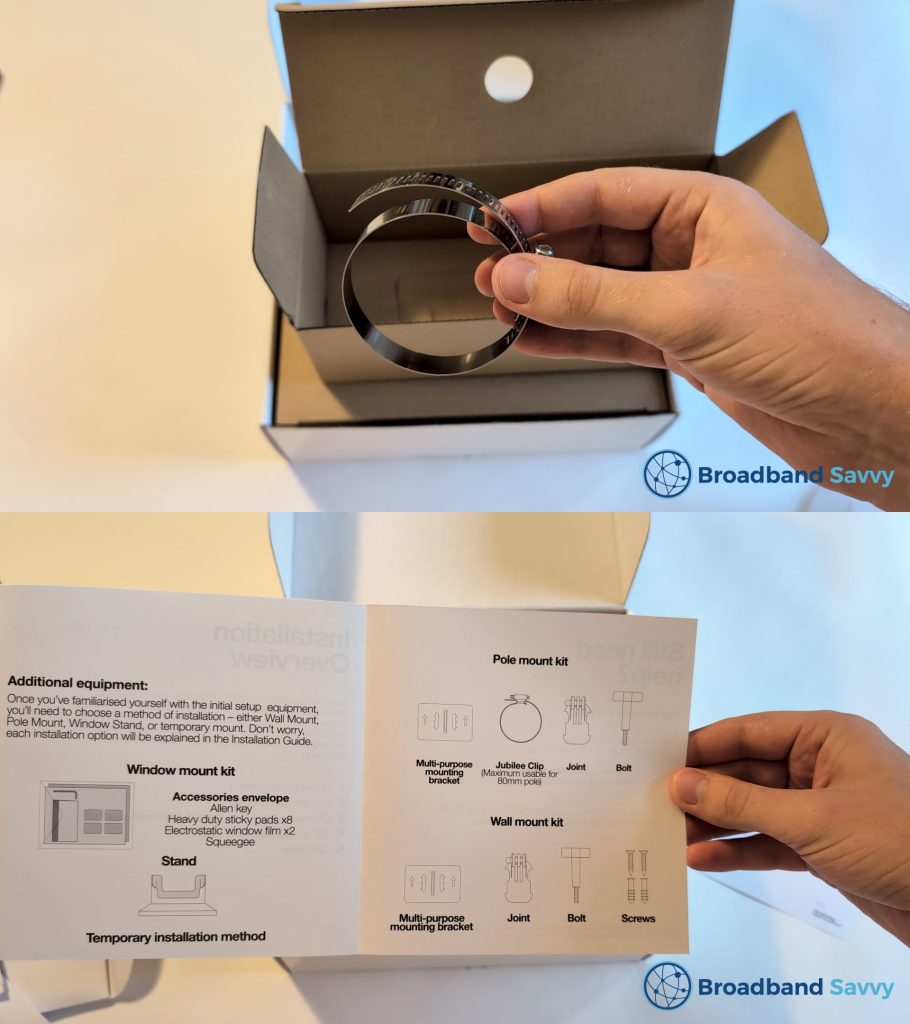
Window installation: Three provides two sheets of electrostatic film and two sets of four relatively thick sticky pads, to attach the antenna to a window. This was the best mounting method for us, and is also a good way to test the antenna’s performance within the 30-day return window, since you can easily install and remove the antenna if necessary using this method.
There are more detailed instructions for all of these installation methods included in the box when you buy.
With a window installation, the first thing you want to do is thoroughly clean the glass, to remove any dirt or dust that could affect the sticky pads’ adhesiveness.
Next, peel off the backing of one of the electrostatic film pads supplied in the box, and affix it to the window, sticky side down, where you want to place the antenna.
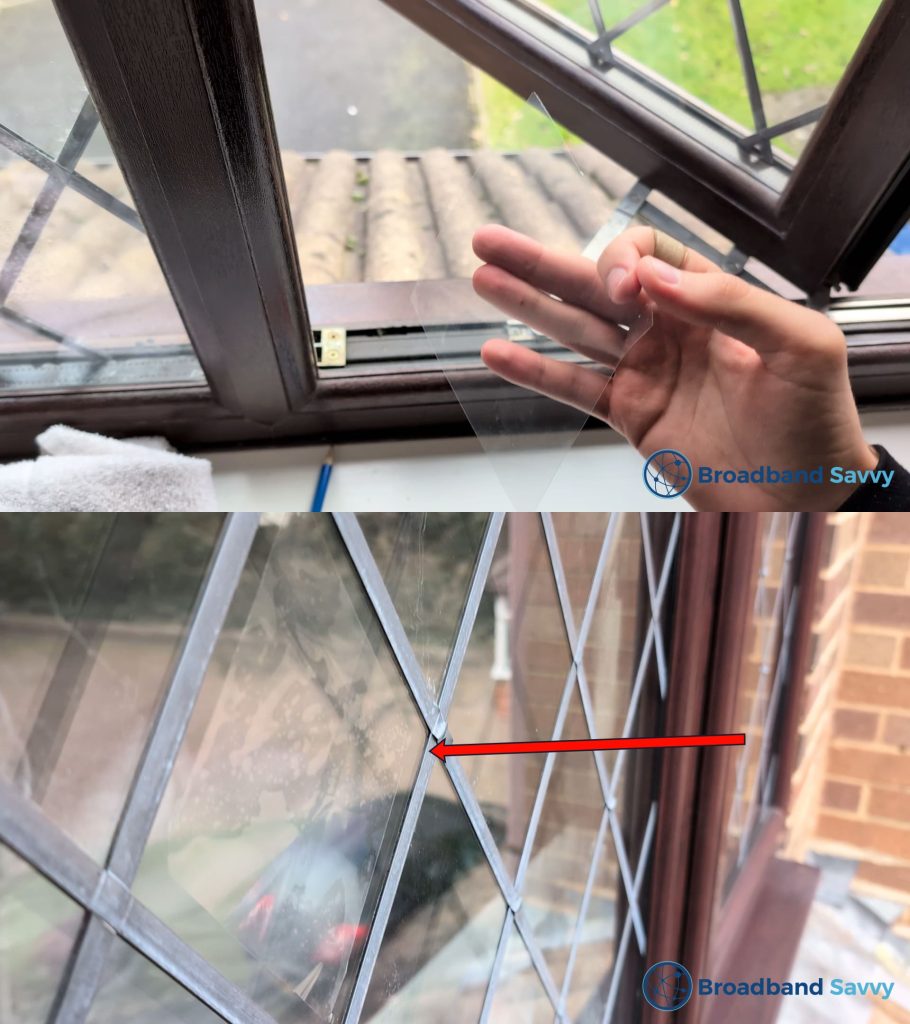
We ran into an issue here. Our windows are leaded, meaning they have raised lines going across the windows in a diamond shape.
We couldn’t place the rectangular static film or sticky pads over these raised lines on the windows, or they would have likely come off. So, we cut down the film before peeling it, so that it would fit inside one of the diamonds. If you have normal windows, you don’t need to do this.
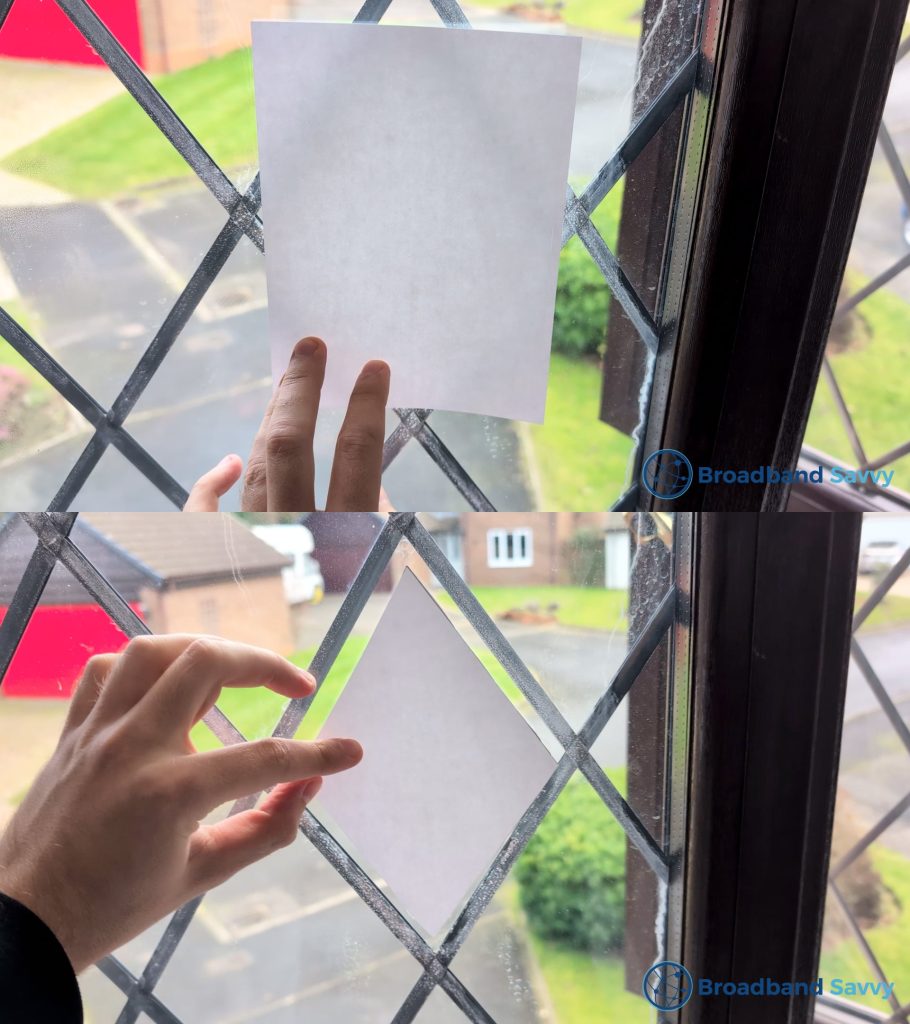
Once the film is on the window, you want to push out any air bubbles trapped underneath it.
Three states that they include a squeegee tool in the box to make this easier, but we didn’t get one, so we used a credit card instead.

When there are no air bubbles left, peel the red sticky pads off their plastic film one by one, and stick them to the back of the antenna.
It’s best to place one in each of the four corners – there are markings on the back showing you where to put them, about 5mm from the edges. However, we had to position ours more centrally, because we cut our backing film small.

Peel the red backing plastic off each of the sticky pads, and place the antenna on the window, with the sticky pads inside the confines of the electrostatic film.
IMPORTANT: before doing this, make sure that the Ethernet cable is plugged in and its enclosure is screwed on, as this will be difficult to do later. If you have not removed the enclosure, you don’t have to worry – it is screwed on properly and the cable is attached out of the box.
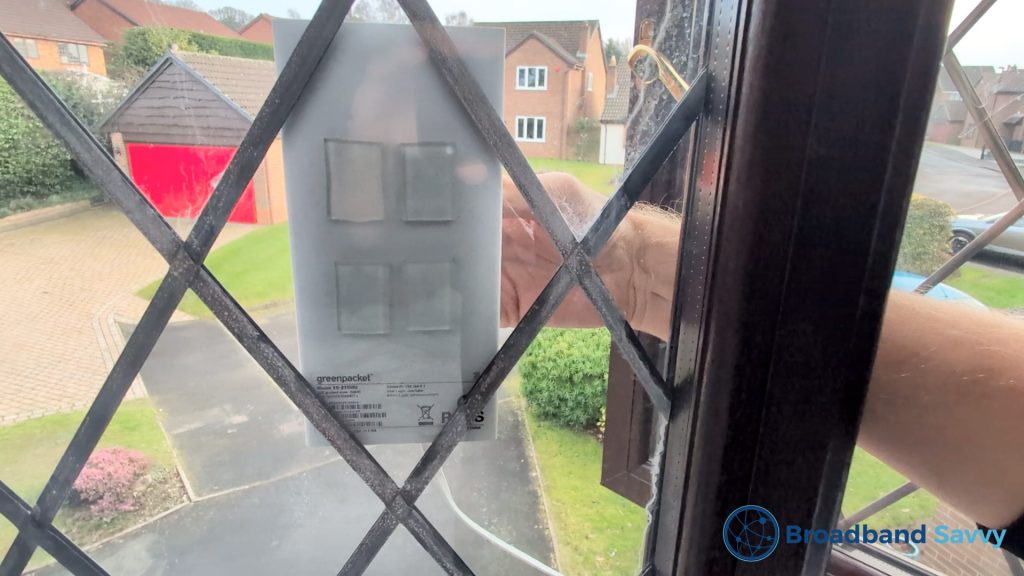
Push down firmly for at least 30 seconds, to ensure the pads adhere properly.
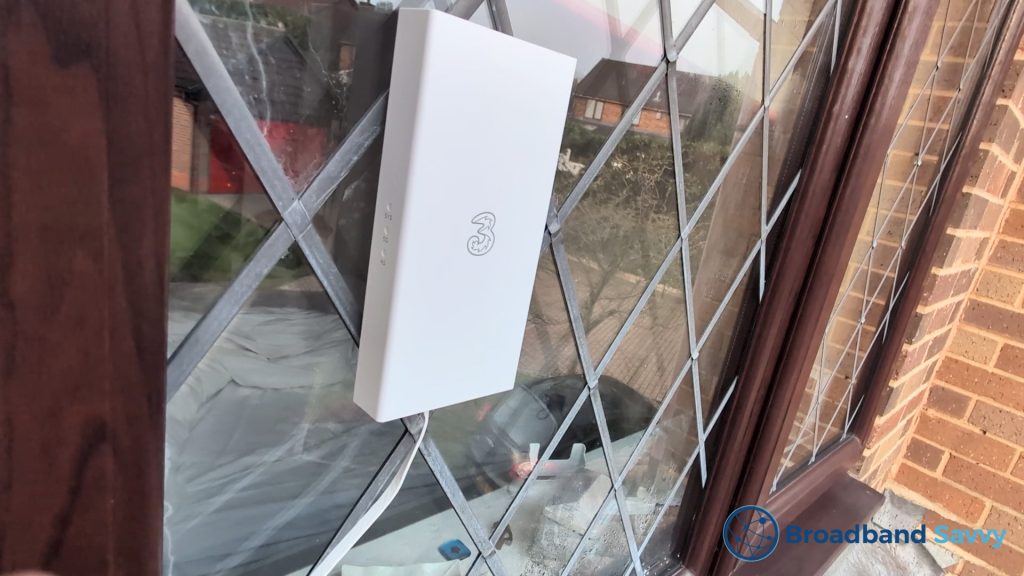
We have not tested the other mounting methods yet, but are quite happy with the window option. The sticky pads do a really good job of keeping the antenna in place. It has survived winter weather quite well, including storms and sub-zero temperatures, with no issues at all.
3. Set up the router
From the antenna, feed the Ethernet cable into your house, towards where you want to put the router.
We fed the cable through a window, then shut the window on it. There are no problems with doing this – the window still seals, with no draught coming in, and this does not damage the cable, or affect data transmission.
Run the spool of Ethernet cable where you want to set up the router. You might want to position it somewhere more central inside your house, in order to get the best possible WiFi signal.
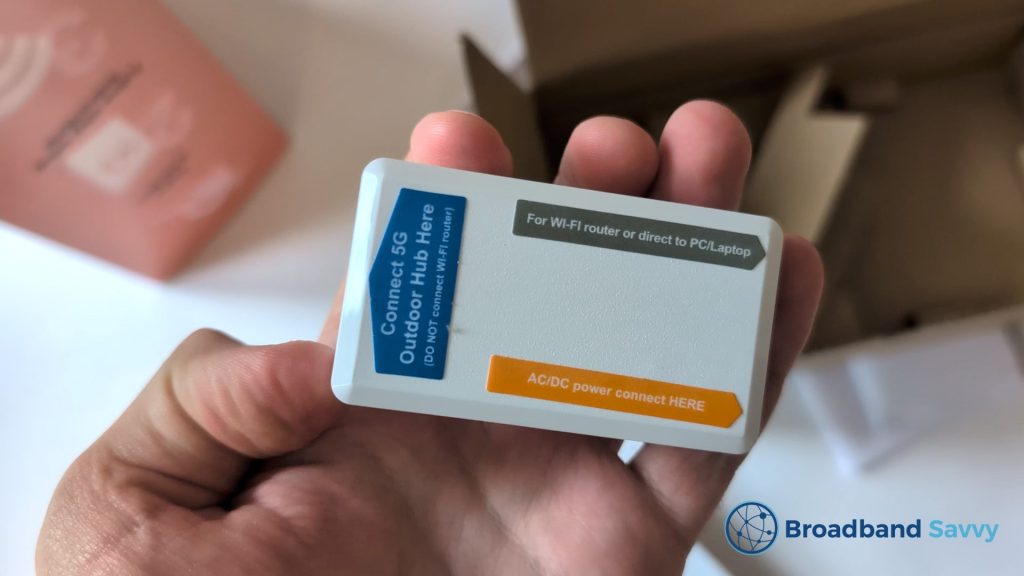
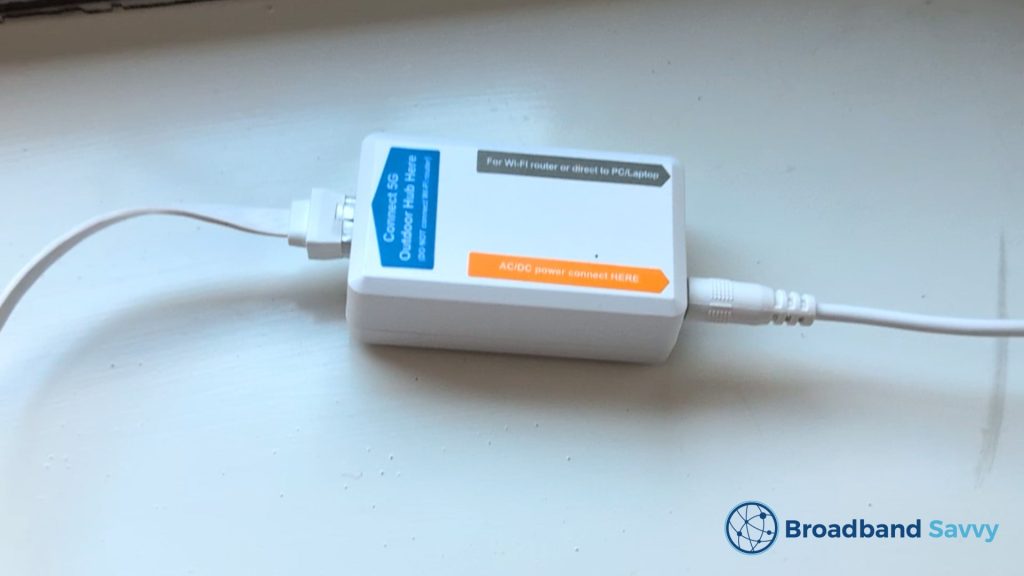
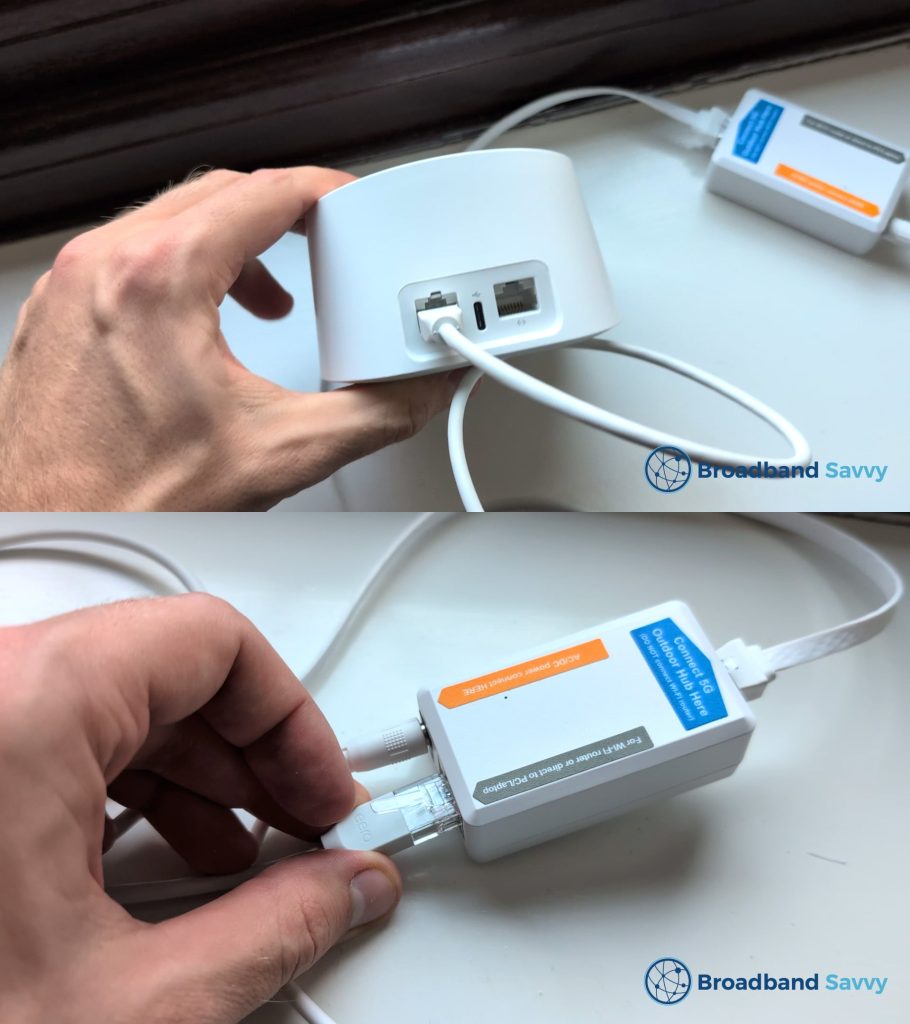
Then, plug the other end of the cable into the PoE adapter. The correct Ethernet port is labelled in blue, shown on the left below.
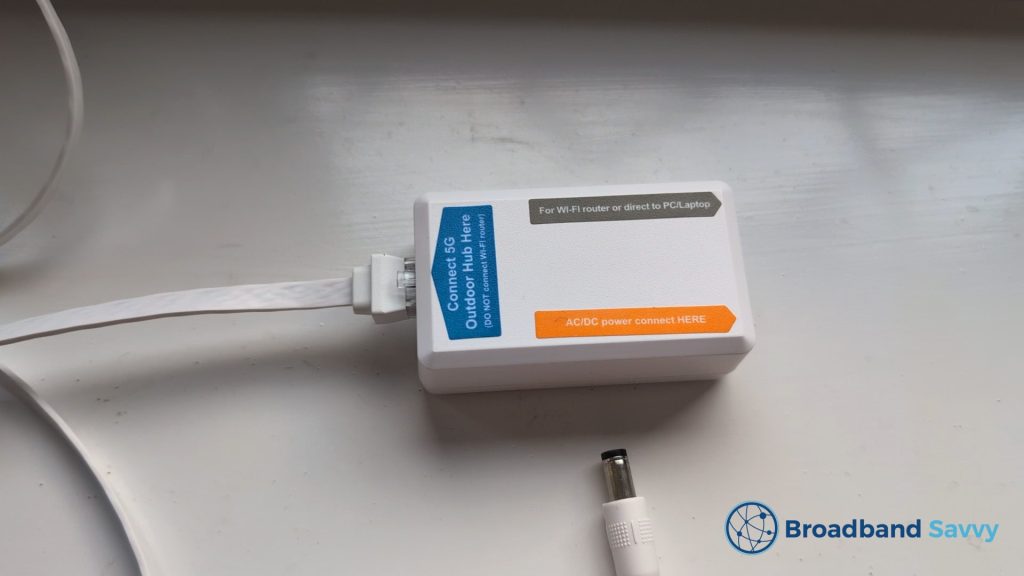
Plug the PoE adapter into power, using the included cable. You want to plug the power cable into the circular connector on the adapter, with the orange label.
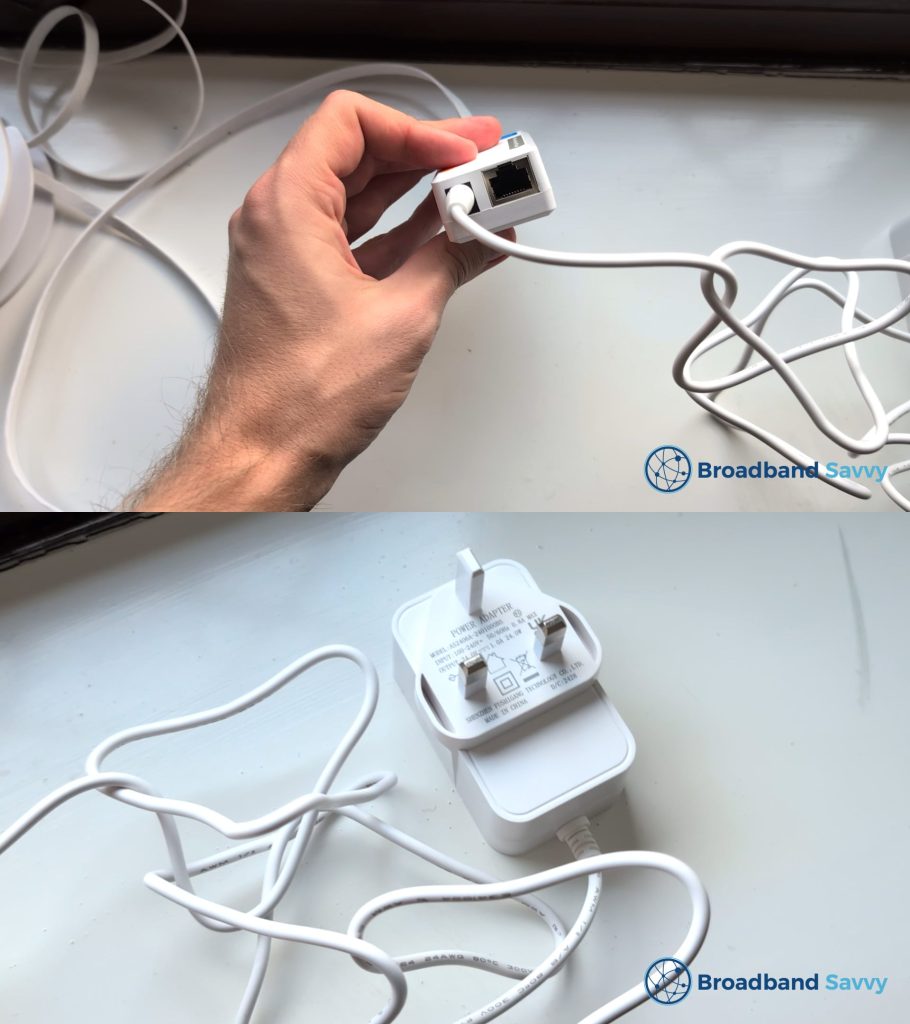
Then, plug the router into the other end of the PoE adapter, using the second included Ethernet cable (not the one attached to the antenna). You want to plug it in where the grey label is.
Finally, plug the eero router into power, using the USB-C power adapter.
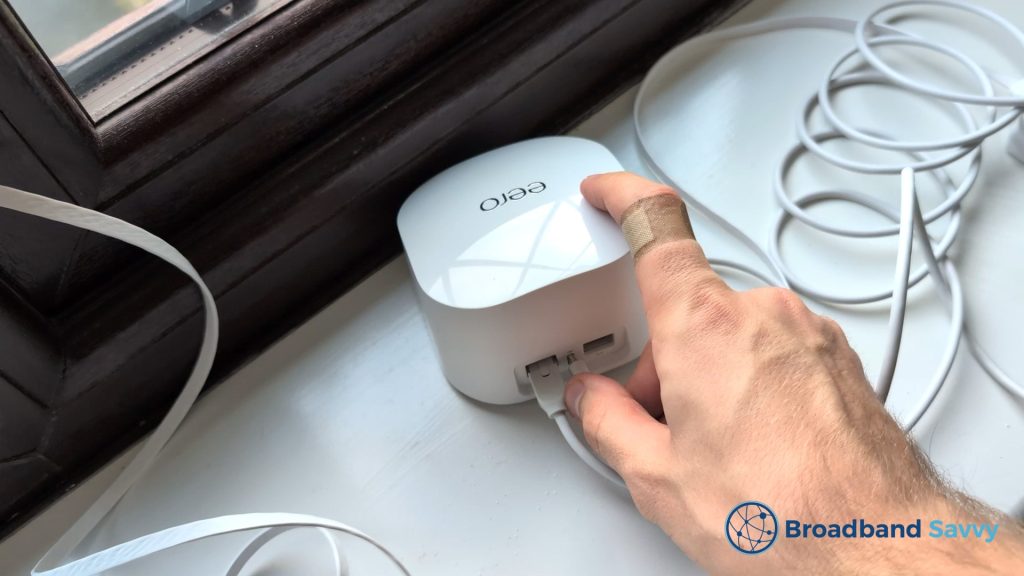
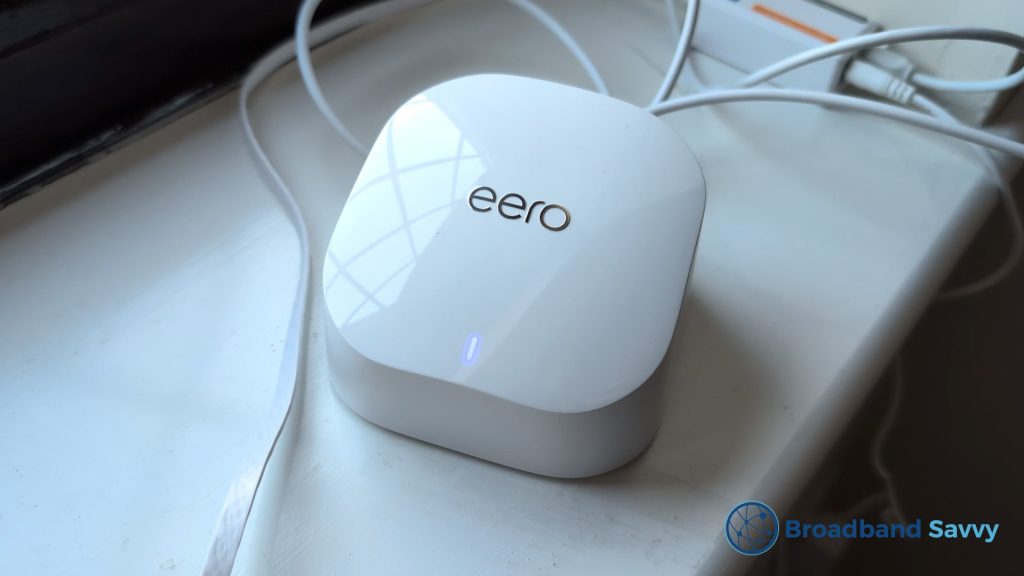
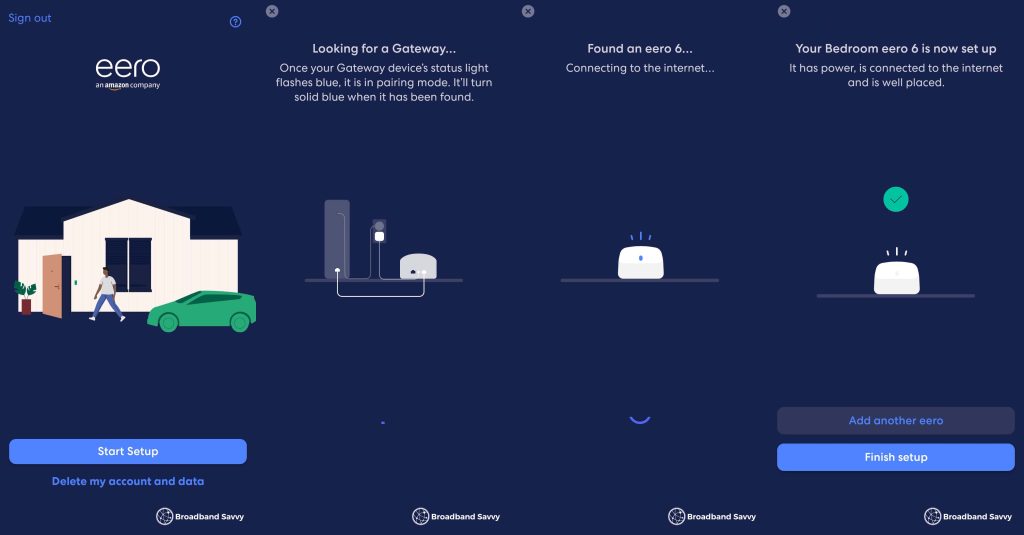
Your eero 6 will boot up, and eventually begin showing a blue flashing light. This means it’s ready to set up.
To do this, you will need to download the eero app from the App Store or Google Play. Then, follow the prompts to set up your router.
For us, we had some issues getting an internet connection to the router during the setup process, according to the app. Unplugging and plugging back in the antenna and router and restarting the setup process in the app fixed this problem.
4. Connect to WiFi
Once you’ve completed the eero setup wizard, you can connect to WiFi.
The eero app allows you to instantly add the WiFi network, and you can login using the password you’ve specified in the app.
Three 5G Outdoor Hub speed tests
We performed a number of speed tests with the Outdoor 5G Hub, to assess how much of a benefit the outdoor antenna provides, in terms of download and upload speeds.
For context, this is a typical download speed we receive using the regular Three 5G Hub at the same address, using only its internal antennas.
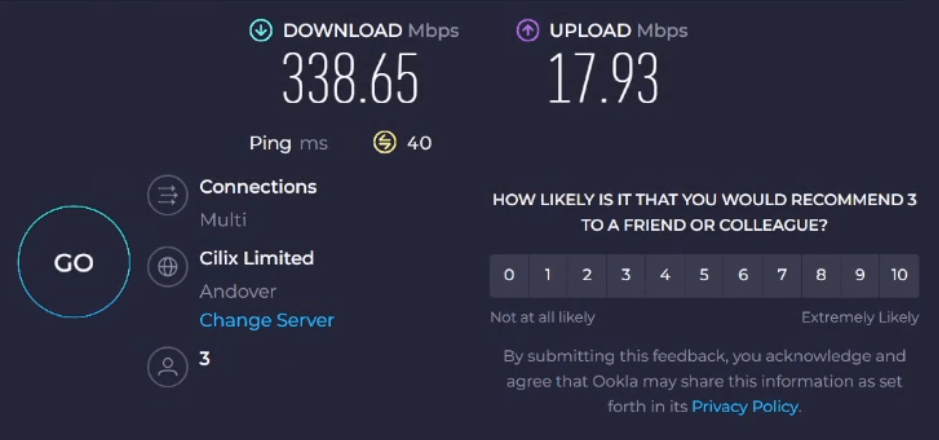
We are in a location with good indoor and outdoor 5G signal according to the Three network coverage map.
1. Close range, WiFi
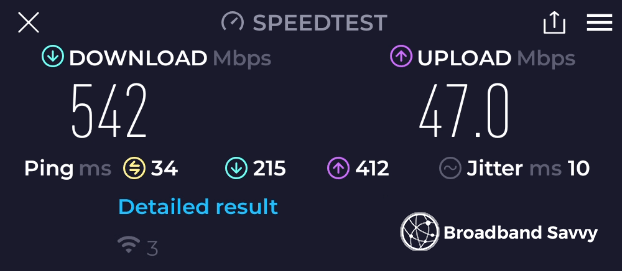
- Download speed: 542 Mbps
- Upload speed: 47 Mbps
- Latency: 34ms
2. Medium range, WiFi
Test taken a few rooms away from the router, on the same floor.
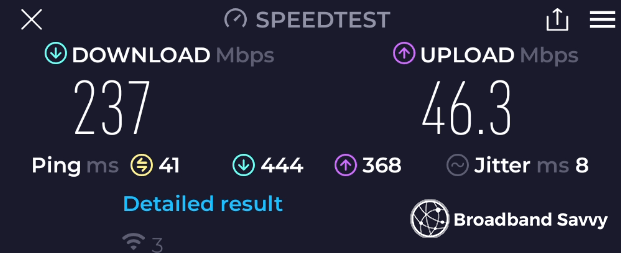
- Download speed: 237 Mbps
- Upload speed: 46.3 Mbps
- Latency: 41ms
3. Long range, WiFi
Test taken downstairs, on the opposite side of the house to the router.
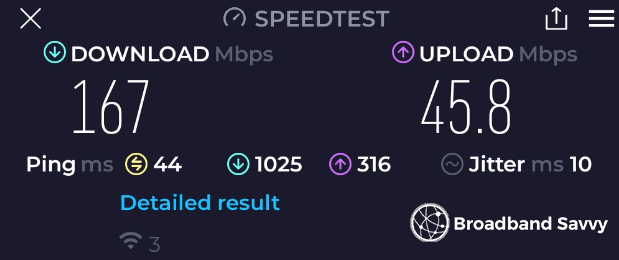
- Download speed: 167 Mbps
- Upload speed: 45.8 Mbps
- Latency: 44ms
4. Ethernet
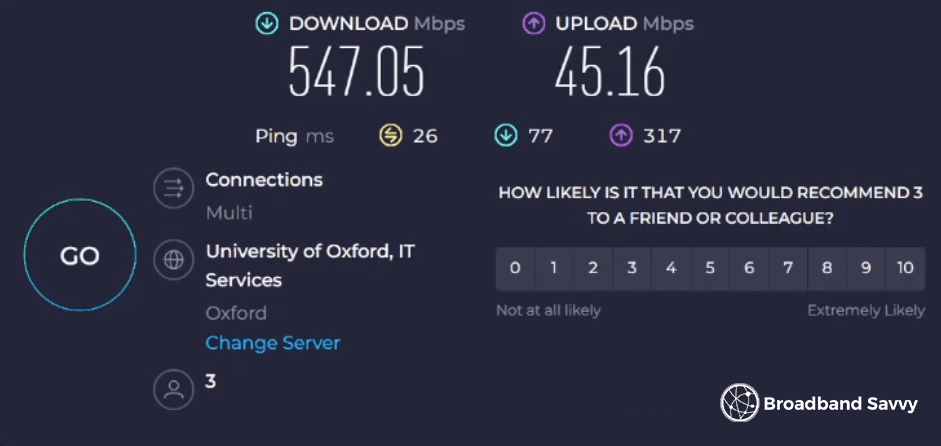
- Download speed: 547.05 Mbps
- Upload speed: 45.16 Mbps
- Latency: 26ms
We see a significant lift in download speeds using the 5G Outdoor Hub with its external antenna, compared to using the 5G Hub on its own.
Our download speeds increased from an average of 300 Mbps to an average of 400-500 Mbps, which is very impressive.
Using the ZTE MC888 5G Hub, our speeds would sometimes spike above 350 Mbps. But with this router and antenna bundle, we’re able to achieve much higher download speeds on a consistent basis.
But the best thing about the 5G Outdoor Hub for us is the upload speeds.
Normally, using mobile broadband, especially on the Three network, our upload speeds would be limited to 10-20 Mbps or so.
With the Outdoor Hub, we get about double that. We have never been able to achieve upload speeds of more than 20 Mbps using wireless internet at this address before.
Our latency is also slightly better over 5G internet since installing the antenna – typically around 5-10ms lower. We’ve tested gaming performance using this router and antenna bundle later in the article.
Three 5G Outdoor Hub WiFi performance
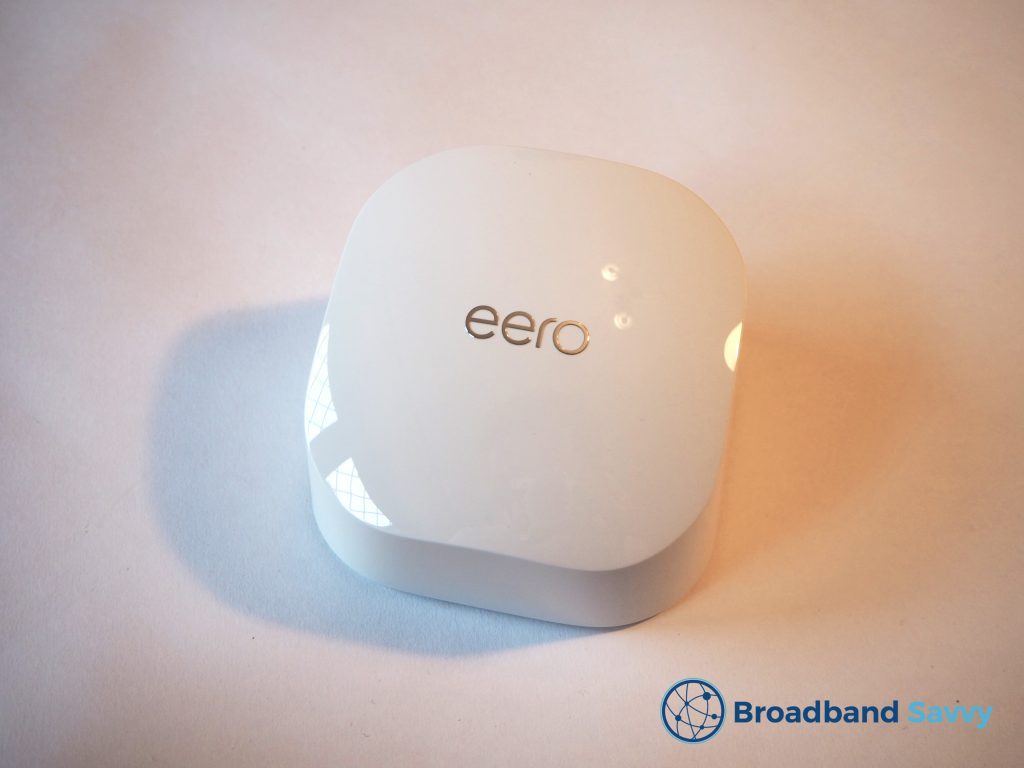
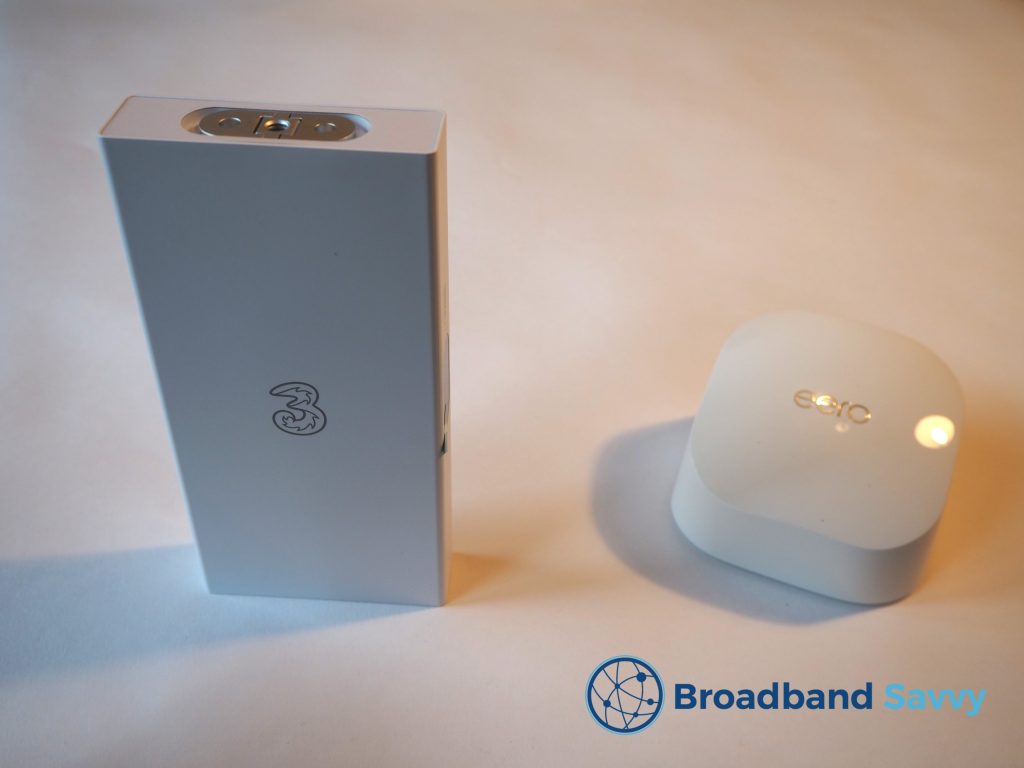
Compared to most WiFi routers, the eero 6 is quite a small device.
However, it still performs well when it comes to WiFi signal. We were able to get online throughout our four-bedroom house, using the supplied eero 6 next to where we installed the antenna, on an upstairs windowsill.
If we installed the router more centrally, we think our download speeds would have stayed above 200 Mbps throughout the house. It took going downstairs, on the opposite corner of the house to the router, to get a reading of 167 Mbps.
The other good thing about the eero 6 is it’s designed to be used as a mesh WiFi node. If you buy more eero units, you can connect them to each other wirelessly, and create a network of WiFi access points, all on the same hotspot (no need to switch WiFi networks), allowing you to get better signal, if you have a larger house.
This wasn’t necessary for us though, in a medium-sized four-bedroom house at least, partly because this router supports WiFi 6.
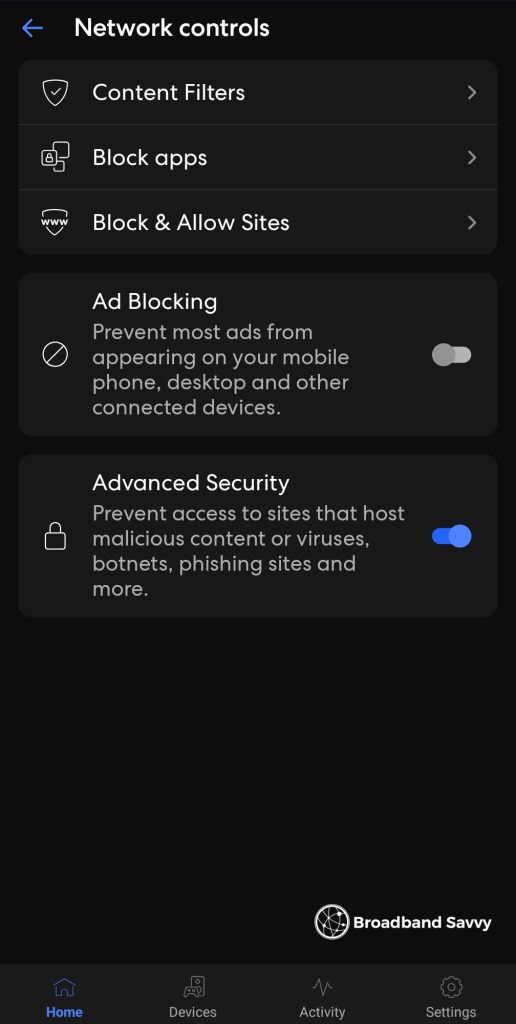
We didn’t like that we had to install a mobile app to set up the router, but the eero app is quite useful. It allows you to do things like turn on ad blocking across your entire internet connection, which not many routers allow you to do this easily.
The worst thing about the eero 6 is the lack of Ethernet ports. After plugging in the cable from the PoE adapter, only one port is usable.
You will need to buy more eero units to get more Ethernet ports. Three doesn’t sell them, but you can pick them up on Amazon.
Three 5G Outdoor Hub gaming test
With 4G or 5G broadband, your ping can often be a bit higher compared to using a fibre broadband connection.
Despite this though, we have found the Three 4G Hub and 5G Hub still perform well when online gaming, especially when plugged into the router using a LAN cable.
Since we are getting even lower latency compared to Three’s other routers with the Outdoor 5G Hub, we decided to do some gaming tests on Rocket League and Team Fortress 2, to see how smooth the experience is.

When plugged into the router using an Ethernet cable, our gaming experience was very similar to using the normal 5G Hub – that is to say, essentially the exact same as using fibre broadband, just with a slightly higher reported latency.
Gameplay was smooth, with no jittering or packet loss, and we did not experience any lag spikes.
Our in-game ping was shown as about 25ms to nearby servers, compared to the 40ms or so we normally experience on 5G internet, but gameplay felt about the same – we didn’t really notice the difference.
Ultimately, for most online games where you need a low latency, we think Three’s outdoor home broadband solution works really well. The experience is basically identical to gaming on a wired broadband connection.
We do recommend plugging your computer or laptop into the router with an Ethernet cable though, instead of using WiFi, in order to minimise your ping.
Three 5G Outdoor Hub value for money
Given what it costs, the Three 5G Outdoor Hub is almost unbeatable value for money.
It offers download speeds of around 300-500 Mbps at our address, for less than what most fibre broadband providers would charge you for a 70 Mbps broadband plan.
There are no upfront fees, and Three wireless home internet typically costs less than £25 per month.
The Outdoor Hub also comes with a 30 day return policy, which most other broadband deals don’t offer, allowing you to see what the speeds are like at your address before committing to a 24 month contract.
You also get unlimited data included as standard, which isn’t always the case when using wireless broadband, and the eero router is quite a good bit of kit, as long as you don’t mind the lack of Ethernet ports.
Just make sure before buying that you have good Three 5G signal at your address, using their network coverage map.
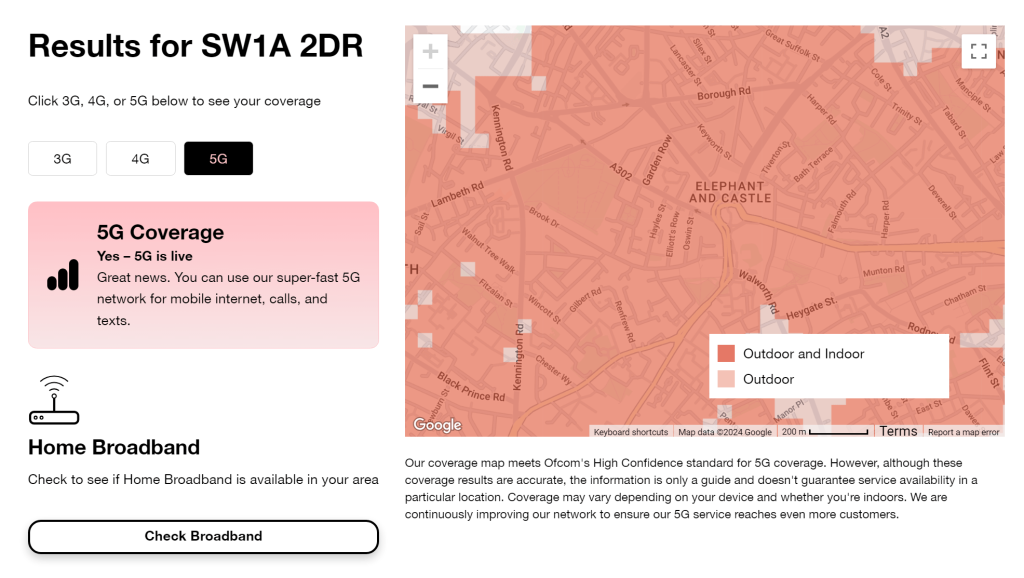
You want to see at least outdoor 5G signal available on your street, according to the map.
If you have indoor 5G signal, this will work for the Outdoor Hub, but Three will likely redirect you to the indoor 5G Hub instead if you use their Home Broadband postcode checker.
Is the Three 5G Outdoor Hub worth buying? Our verdict
There are a lot of things we really like about the Three Outdoor 5G Hub:
- At our address, it offers download speeds of 400-500 Mbps or so, and upload speeds of 30-45 Mbps, which is more than enough for most families. Our speeds were also very consistent, which isn’t always the case when using wireless broadband.
- There is a quite flexible 30-day return window, allowing you to test and see what the speeds are like before buying.
- Three normally charges only about £20-£25 for this bundle, making it much better value for money than most fixed-line broadband deals.
- This home broadband plan performs well when online gaming, even on quite ping-sensitive games.
There are some downsides to the Outdoor Hub though:
- The set up process is a bit more involved compared to the regular 5G Hub, although we think it’s worth it in return for the faster speeds you receive.
- The eero router only has one usable LAN port. You’ll need to buy more eero nodes to get more ports.
Overall, we rate the Three Outdoor 5G Hub 4.8 out of 5. If you don’t mind taking an hour or two to install the antenna, this is the best 5G internet solution in the UK at the moment – and it beats most fibre broadband plans in terms of value for money.
Click here to see what deals Three is offering on 5G home broadband at your address at the moment.
Three 5G Outdoor Hub alternatives
If you’re not sure whether the Outdoor 5G Hub is right for you, there are some other ways of getting online using 4G or 5G that you might like to consider.
1. Three 5G Hub
If you have strong 5G signal in your area, Three will redirect you to their regular 5G Hub router when you put in your postcode on their website.
Rather than having an antenna that plugs into a separate WiFi router, the Three 5G Hub is an all-in-one unit.
You insert the SIM card into the router (a ZTE MC888), plug it into mains power, and connect to its WiFi network.
The regular 5G Hub is much more simple to set up, and you can also unplug it and take it with you more easily, in order to get online on holiday elsewhere in the UK for example.
Read our full review of the Three 5G Hub.
2. Three 5G MiFi
This is a 5G mobile Wi-Fi (MiFi) device, rather than a 5G router, which still comes with a 24 month unlimited data contract from Three.
The difference is, this device has a battery, rather than plugging into mains power, meaning it’s much more portable, and is a really good choice when travelling, in the UK at least.
However, you’ll only be able to get download speeds of about 150 Mbps using Three MiFi from our testing, compared to 300-500 Mbps with their proper 5G routers.
Read our full review of Three 5G MiFi.
3. National Broadband
If you don’t get great Three mobile signal, even with an antenna, National Broadband is worth looking at.
They deliver wireless home broadband using all of the big four mobile networks. When you sign up, they’ll choose the best mobile network at your address, whether it be Three, O2, EE, or Vodafone, to help you get the best possible speeds.
They have a 4G internet plan, which comes with professional antenna installation, or a 5G tariff you can set up yourself, albeit with no antenna included.
The downside is, this provider’s deals are a lot more expensive than any of Three’s home broadband plans.
Conclusion
You’ve reached the end of our Three 5G Outdoor Hub test and review.
Have any questions about this router and antenna bundle? Leave us a comment below, and we’ll get back to you ASAP.
Related posts


About the author

Tyler is the co-founder of Broadband Savvy. He has been helping people improve their broadband connectivity since 2018 by writing about fibre broadband and mobile broadband providers, as well as creating tutorials to help people improve their broadband speeds and Wi-Fi signal.
Tyler is responsible for the majority of buyer’s guides and broadband reviews published on Broadband Savvy. He has a wealth of experience testing and reviewing different broadband tariffs, including fibre internet plans, as well as 4G and 5G broadband deals. He is responsible for testing and evaluating Wi-Fi routers, performing speed and latency tests, and comparing the value for money of different broadband providers on the market in the UK.
Before co-founding Broadband Savvy, Tyler had a long history of tinkering with computers. He built his first PC at the age of 12, and since then, he’s become obsessed with all things networking and internet-related. He’s a massive gamer, loves Rocket League, and also plays Sunday League football.